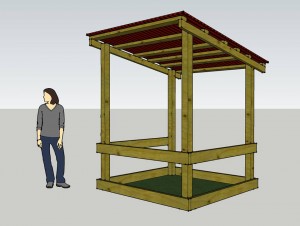
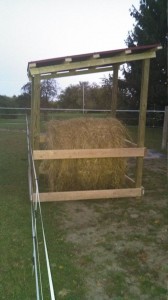
For those of you who feed round bale hay know, the hardest part is keeping the bale dry so it doesn’t mold before the animals have time to finish eating it. Rain and warm air can destroy a bale in as little as 24 hours! This simple round bale hay feeder is not only inexpensive to build but will help contain the hay and keep it dry too.
Feeder will hold a standard 4×4 round bale
Supply List
– (4) 4x4x8 (PT)
– (3) 2x6x12 (PT)
– (1) 2x6x8 (PT)
– (7) 2x4x8 (dimensional lumber)
– 5lbs deck crews
– (2) Ondura Roof Panels (many colors available)
– (1) box Ondura roofing nails (matching color with rubber washer)
Pre cuts!
- Cut 1 foot off (2) of the 4x4x8
- Cut the 2x6x12 in half (be sure to measure first from both ends as they probably aren’t exactly 12′ long
- Cut the 2x6x8 to match the length of the 2x6x12 cuts
- Cut off 4 inches off (5) of the 2x4x8’s (mark a line 10 inches across the board on both sides)
- Cut (2) 2x4x8 to 1″ shorter than the length of the Ondura Roofing
Assembly Side 1 (measure lots to make sure this side is even!)
- Place an 8ft 4×4 and a 7ft 4×4 6ft apart
- Draw a line 3 inches from the bottom and 3 feet from the bottom of both 4×4
- Screw a 2x6x6 so at the 3 inch mark and another at the 3ft mark (below the mark not above it)
- Screw the 2x4x8 you cut the length of the roofing so that it is even between the cut ends of the 4×4’s
Assembly Side 2
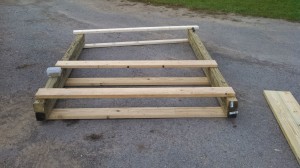
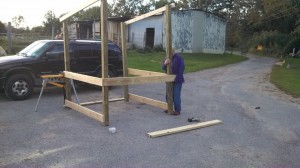
- This goes faster. Flip your finished side over so the 2×6’s are on the ground.
- Lay the new 4×4’s on top of the old ones and the 2×6’s and 2×4 to match the bottom. (See photo)
Assembly Side 3&4
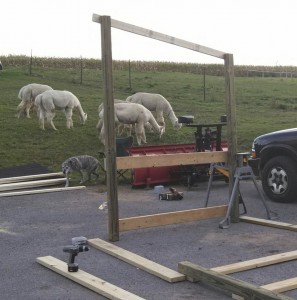
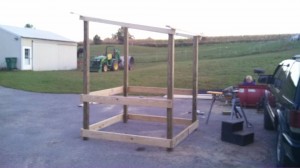
- Stand up Side 2 have a human or your Jaw Horse hold it
- Stand up Side 1 have a human or a Jaw Horse hold it
- Screw in the upper 2x6x6. Use 1 screw on side 2 first then another on side 2 that way you can adjust things before screwing it down. (FYI I’m using a minimum of 4 screws at each point!!!)
- Screw in the bottom 2x6x6 in the front and the back
Roof Assembly
- Screw in the 5 2×4’s at even distances across the 2×4’s screwed to the 4×4’s
- Lay out your Ondura roofing across the top
- If you don’t have long arms put one roofing panel on at a time so you can nail it down from both sides
- Nail at the crest of the wave NOT the valley. Nailing a hole in the valley will just cause water to leak through! Make sure your nails are straight when nailing or you can rip the Ondura. If they are straight, they nail VERY easily.
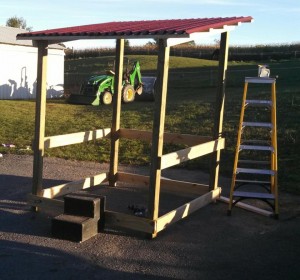
Tada! You’re done. This model is meant to be used in line with a fence. The open back allows you to drive a bale in and drop it off without having to go into the fence! Brilliant! The reason why the bottom boards are 3″ off the ground is so the unit will sink in during “mud” season to help hold it in place from moving.
*** Help keep my website up and running. Click on our sponsor link! It doesn’t cost you anything and gives me about $0.20 to help pay for creating this content and keeping this website up and running!
