How To Wash Alpaca Fiber / Fleece

The biggest concern with novice fiber workers is accidentally felting the beautiful fleece they just got. Not to worry, washing fiber isn’t as scary as it sounds. You just need to remember one thing. DO NOT AGITATE. To felt fiber you need 3 things, hot water, soap and agitation. If you neglect to agitate you won’t felt!

Here’s how I wash my fiber.

1.  Skirt 1 pound of fiber you plan on washing. Get rid of poop and large vegetable mater
2.  Loosely put ¼ of a pound into a lingerie bag 15”x18” – If you over stuff the bag, the center of the fiber won’t get clean. Repeat for 3 other bags.
Alpaca Fiber In Bags
3.  Fill up your washing machine with HOT water.
4.  Once the machine is full add in 1 cup of Dawn Original Dish Soap. Stir the water to evenly mix in the soap but not so hard it makes suds. TURN OFF YOUR WASHER!!!

5.  Place a bag into the water, use tongs to push the bag under 2-3 times until you see/feel the fiber loosen up in the bag and it is fully soaked. Repeat with your other 3 bags.

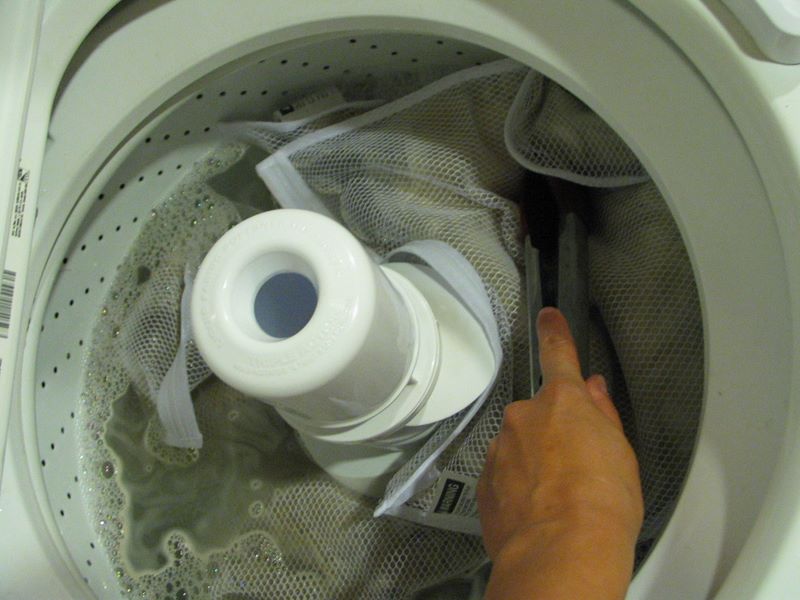
6.  Yup, the water is already dirty, ewww. Make sure your washer is OFF and close the lid. Let your fiber soak for 30 minutes.

7.  Remove the bags and let the water drain from them and set aside. Turn on your washer and have it drain the water out.
8.  Fill your washer with WARM water this time and NO soap. TURN OFF WASHER when full.
9.  Put in your first fiber bag into the warm water. I use my hands this time to submerge the bag and fluff up the fiber in it until it’s loose in the bag. Repeat for the 3 remaining bags
10.  Let sit for 30 minutes
11.  Repeat steps 7-9 until the rinse water is clear after 30 minutes.
12.  When your rinse water is finally clear, remove the bags and let drain for the last time. Turn on the washer and drain the water again.
13.  Place bags evenly in the empty washer.
14.  Put your washer on the SPIN cycle and turn on so it will squeeze the rest of the water out of your fiber.

Drying Your Washed Fiber:

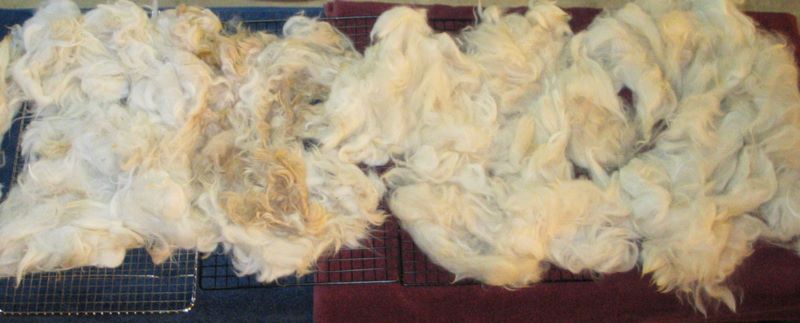
There are several ways to dry your fiber. It all depends on what you have available to you. I’ve seen some folks lay the fiber out on a chair on their deck and let Mother Nature do her work. Sweater racks also work well.

I accidentally found a great way for me to dry my fiber when Mother Nature wasn’t cooperating. Rain and high humidity makes for slow fiber drying. So I laid out my fiber on an old coffee table covered in towels in my basement. I don’t have a sweater rack have plenty of cookie racks so I used those to get a little lift so air could flow under the fiber. I placed the table next to the dehumidifier and by the next morning it was dry!

Now that you have clean fiber let’s see what you’ve done with it at Fiber Arts Friday’s!

How To Warp A Mini Loom


Card weaving is really fun, easy and portable.  Depending on the design you are doing the work can move very quickly.  The hardest part about card weaving is warping your loom.  Here is a short video I’ve made on how to warp the Palmer Loom I use for many of my projects.

In this video I’m using all one color because the end product is for the show halter I’m working on.  In future series I will be using multiple colors to show you how you can make designs and patters in your weave. 

Special Charity Fiber Arts Friday.  Please Visit Alpaca Farm Girl

Palmer Looms

Custom Show Halter


I’ve probably mentioned it before but my first love has been horses.  I’ve been in love with them since I was 2.  So when I found the alpaca I’ve been thinking of how I can incorporate their fiber with my first passion.

I’ve been braiding custom reins for customers for quite a while which brought me my newest project; a custom show halter for a Moriesian ready in time for her inspection later this year.  This request introduced me to a new method of working with alpaca fiber, card weaving.  Also known as tablet weaving this method involves the use of cards with 4 holes punched in each corner.  Depending on how you manipulate the cards you can create intricate patterns. I’ll get into more about card weaving and how to warp a loom and simple patterns in another post series.

As for the halter, I’ve weaved a 1” wide strap made from a 3 ply sport weight alpaca/wool blend yarn.  I hand sewed the strap to halter hardware and will eventually ad the “bling” trim.  The trim is a metallic blue/gold color to match the colors of the customer’s farm.   Photos are of the halter crown and with the trim laid out over the crown to get an idea of the finished product.  


Stay tuned for more posts as I continue on with this project and to see the end result.

As always be sure to check out Alpaca Farm Girl’s Fiber Arts Friday for other projects.

Adding Zinc to Your Alpaca’s Diet:

There are several articles out there about zinc deficiencies in alpacas.  Some make a big deal out of it while others say that hardly any alpacas have an issue with low zinc levels.   Some say some skin problems or the lack of hair on the nose of a black alpaca can be attributed to a zinc deficiency while others state it’s itching and flies or mites.

I’m not here to give medical advice but would like to let you know what method I use to make sure my alpacas have a low dose of zinc in their diets.  Better yet, it’s probably the cheapest supplement program you’ll hear of I’m sure.

What’s my solution? I use Galvanized Carriage Bolts.  A Galvanized bolt has a zinc coating and when submerged, the zinc slowly dilutes into the water.    I like this method because all alpacas will drink water so you’re sure they are getting a low zinc dose with it. 

I use (2) ½” carriage bolts per 5 gallons.  Depending on how often you have to fill/change your water, the bolts should last 6 months to a year.  You’ll know when it’s time to change out your bolts because the zinc coating on them will no longer be visible.