Dutch Hollow’s Albina

Baby’s Arrival Story:

Like many alpaca ranchers we have 2 full time jobs, alpacas and my the day job.  Which means I’m usually working when alpacas are known to go into labor.  No worries we recently fitted the girls stall, paddock and pasture with cameras so I can monitor them while at work.  Seemed like a bit of an expensive thing to do but worth every penny after the arrival of our 1st cria. 

Around 2pm I noticed that Bella was acting strangely on the camera.  She was just a little white dot out in a big green field but the fact she wasn’t with the others concerned me.  By 3pm she would stand up, lay down, roll, walk to a new spot and lay back down.  That was my confirmation that she was truly in distress.  I bid my boss farewell and rushed the long 20 minute trip home.

When I go home sure enough she was well into labor.  The bad news? The weather took a turn for the worse.  50mph winds and driving rain arrived about the same time I did.  I quickly changed clothes, grabbed my cria kit and ran out into the field.  I tried to coax Bella up but she wasn’t about to budge.   Since the weather was so poor I decided to give a little pull on baby to help speed things up.  In about 1 minute of help baby slid out at 4:09pm and was kicking, humming and all around feisty.  I quickly wrapped it up in dry towels and brought it back to the barn in a warm dry stall.  I returned for Bella and managed to get her up and slowly walked her in too to be with her baby. 

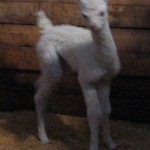
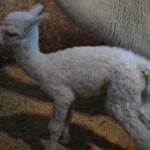
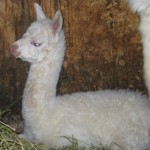
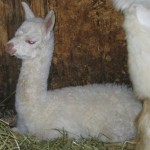
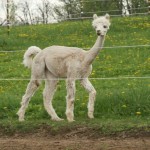
I finally had time to dry off baby and check it out.  Whoo hoo a baby girl and a white one at that.  Pink skin around the eyes, nose and clear toe nails.  She’s white alright! 

So what to name her?  Well I’m from Polish decent and my Husband from Italian, it was only fitting to try and pick a name from our roots.  I was pleased to find a Polish/Italian name in my Polish name book that couldn’t be more fitting for this little girl.   Albina (ahl-BEE-nah)  Meaning bright white.

I present to you Dutch Hollow’s Albina! (1/4 Accoyo, Full Peruvian)


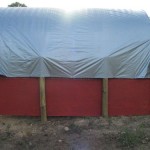
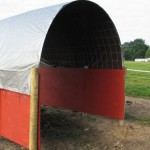
Economy Horse Run-In Shed Shelter Barn

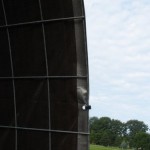
My weekend was a busy one.  With winter coming so are my winter horse boarders.  This year I ended up filling up my 20×35 run-in shed with hay which means I needed a place for the horses to get out of the wind, rain, and snow. The problem?  Yeah I’m broke.  So after researching shelters that are frequently used for alpacas, sheep, goats, and other small livestock I got to thinking; Why can’t it be modified for horses?   The general idea was to use cattle panels for a shelter as I saw at this site.

Saturday morning I woke up with an “ah ha” moment on how to modify the cattle panel shelter for horses.  The idea was to sink some wood posts, use 3/4″ plywood as a kick board, and attach the panels to that.

How to build the horse run-in shed shelter barn
My Supply List

  • (8) pressure treated posts (round or 4×4 will work)
  • (3) 3/4″ ply wood sheets – non treated ok if painted
  • (3) Cattle Panels 52″ x 16′
  • 12×16 heavy duty tarp
  • box of 2″ screws
  • box of fence staples
  • 30 thick UV black cable ties 11″
  • 100 8″ UV black cable ties
  • Can of barn/fence paint
  • Paint Brush

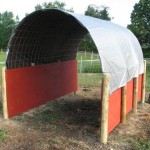
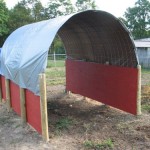
I placed the posts 4′ apart down the long side and 9′ wide.   We get some good snow and wind storms so I didn’t want to put the posts any wider or the dome wouldn’t hold the wind/snow load.  Once the posts were in I put up the ply wood and made sure it was level holding it up with just a couple of screws temporarily.

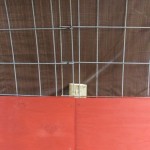
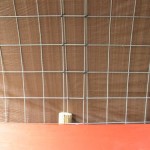
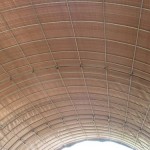
So far this was all a 1 person job.  I needed help to put the cattle panels in place.  We bent them up and placed them between the posts and the ply wood pushing them down 2 squares on each side and then screwed the plywood back to the posts.  I also held the panels to the top of the posts with staples.

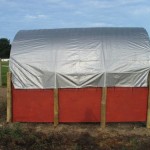
We over lapped the cattle panels as seen in the photos and secured them heavily with cable ties.

Putting the tarp on was easy, I unfolded it, tied a rope to the 2 end corners and threw the top over the dome and pulled the tarp up and over.   I made sure it was even and secured it down with cable ties.

Finishing touch was to paint the plywood so it would weather better.  You can paint the plywood before securing it but I really didn’t have a place to paint it first and found it easier to paint it after it was up and off the ground.

Cost:  $250
Time: 4hrs – This assume you have a Post Hole Digger or Pounder on your tractor or have rented one.


—————————————————————
UPDATE: On 9/28-29/09 we had some nasty storms roll through.  Sustained winds of 20mph and gusts fof 50mph.  The shelter held fast and didn’t appear to even move in the wind.  I thought the horses would be afraid of the sound of the tarp or the cattle panel roof as the wind hit it but nope.  Even my scardy-cat took cover in the shelter.  I have high hopes for it this winter.  I do plan on brushing snow build up on it not to give it any excuse to sag.
————————————————————–
UPDATE: on 10/25/09 Well the winds have snapped off some of the thick cable ties holding the taprt to the cattle panels.  I’ve decided to replace them with twine from my hay bales.  I folded the twine in half and made sure the knot was tight. I’ve had twine hold a fence gate up for 2 years before it failed so there’s no doubt in my mind it’ll be up to the job of holding a tarp on.
————————————————————–
UPDATE: 12/5/09:
So far so good.  We’ve been putting the Big Bale Buddy in the center of the run-in which is keeping the hay dry and allowing 4 horses, 2 on each side, eat without a problem.
————————————————————–
UPDATE: 3/26/2012:
This year I had to put up new panels and a new tarp.  Nasty wind storms of 70+ mph along with wet snow collapsed the roof finally.  The new roof I put up I decided to shorten a bit and slid the cattle panels down an extra foot on each side.  I’ve also gotten good enough moving the panels that I replaced the whole thing by myself with no assistance!
————————————————————–
UPDATE: 5/15/2012:
I just got some photos from someone else who made one of these shelters.  She made some changes to fit her needs and here’s what she said….

Well I finally finished the run in and I think it came out great!. We adjusted your plan a little. I put pressure treated 2×8’s along the bottom so the plywood wouldn’t rot and put silicone in between the plywood and the pressure treated boards. We also used pine 2×8’s to hold down the cattle panels in addition to putting them behind the posts.  I bolted those on to secure them really well. I cemented all the posts to steady everything. I bought a heavy duty tarp hoping that will hold. I put some plastic edging on the plywood inside so they wouldn’t chew on the wood. I have a young boy who loves to chew. Of course they are really afraid of it since I put the tarp on.  It will take time for them to get used to it. If I feed them in there they will eventually come around.  The size is about 9′ x 24′. I thought it was way too big but it seems fine.

CLICK HERE to see photos of her shed
————————————————————–
Crochet Fishnet Scarf

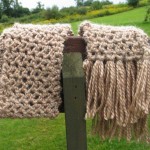
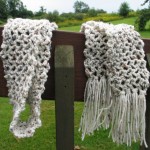
Welcome to Fiber Arts Friday!  I thought I’d give you all a little sneak peak of some of the crochet scarfs I’ve been making this week.  One of my co-workers calls them “Fishnet Scarf.”  Fitting name if you ask me.  

If you’re in the WNY area they will be available for sale the weekend of Sept 26 – 27th for National Alpaca Farm Days

Pst! Ladies if you’re hubby really isn’t into the whole alpaca thing but you want to talk to a farm, have I got a surprise for you!  Dutch Hollow Acres will be at the DEC Days in Avon, NY Sept 26th-27th with some of our alpacas! So, you can ask us all the questions you’d like and the hubby can check out all the hunting and fishing manly stuff.  We’ll be chock full of alpaca socks so it’s a great time to show him how warm alpacas can keep his feet this hunting season too!

The Unintended Pond

While I was working away at our new fence over the weekend the hubby was working on our driveway drainage issue.  The resolution seemed simple enough, dig a trench, lay in the pipe, fill the trench back in.

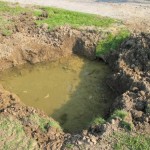
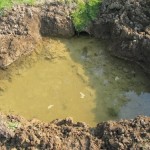
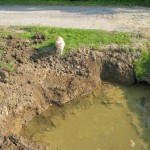
Well it turns out that our water abundant property gave us an unexpected surprise, a new pond!  The collection basin that M. dug tapped into one of our many springs and filled up! It happily flows through the pipe under the driveway and catches up on the other side where the spring naturally percolates out of the ground.

M. will grade off the edges, we’ll add some stone, landscape fabric and plants for a nice finished look!

One thing we never run out of here at Dutch Hollow is fresh clean beautiful spring water. 

Installing Alpaca Paddock Fence

Like most ranchers I’m sure we spent our Labor Day weekend hard at work.  With a new cria due any week now it was long past due to put in field fence.  The last thing I’d want is for a healthy cria to be born just to sneak under the fence and into the horse paddock!

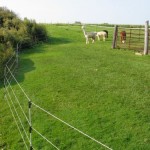
While I worked on taking down the old and installing the new the girls got to enjoy a temporary graze on my “lawn”.   I used, SunGuard II Fiberglass step in posts, Kencove electric twine and a nice wheel winder to make it easier to handle the twine.  Oh, mental note; when using the winding wheels they are fully insulated so if you don’t use all the 800 feet of twine just keep the rest on the wheel, hand the wheel on a nail or something and electrify the fence!  Saves the hassle of cutting your twine just to want it longer the next time you put up a temp paddock. 

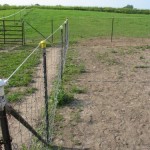
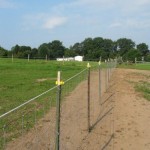
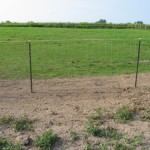
Tractor Supply had a great sale on field fence.   Red Brand Field Fence, some t-post clips, and a few wedge-loc diagonal brace kits and I was ready to go.   We decided to take out the old fence totally, grade out the area to level it off and re pound all the t-posts.  I opted to use t-posts instead of wood because our barn is old and located in a bad spot so some day it’ll have to come down and all the fence will have to be moved again.

I’m very happy with the finished look.  The field fence is 47” high and we topped it off with a strand of hot rope.  This way my nosy horses keep their heads on their side of the fence and feet off of it too.


If any of you moved into an old farm and had to work with what was left over after years of neglect you’ll appreciate the first few photos.