Hay Season (Part 1)

June in Western New York means hay season! This is year 3 of me running our own farm and each year we’re getting “better” at predicting our hay needs and storage space.  This year I think we’ll finally have gotten our act together.

Storage:
In years past my storage space was limited to one 11×11 foot stall.  Amazingly I could squeeze 100 bales into that little space.  OH yeah, you’re looking at the queen of stacking hay.  This year we have plenty of space.  The center of our barn is 18’x35’ and I have been using it as a run-in for the horses.  Before then It was filled with junk and clutter accumulated from previous owners. 

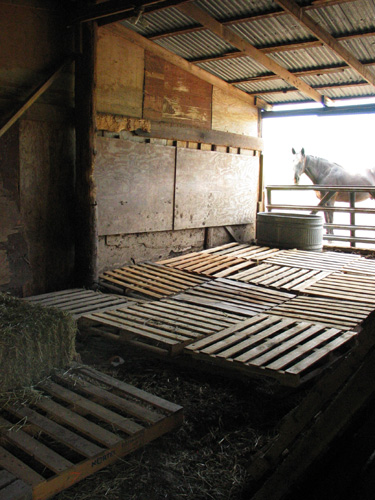
The horses have now been evicted, the floor raked and pallets are laid out.  I’m ready for hay!  I’m hoping to fit 3-400 bales in here with room for a walking path and air flow.

Here’s a photo of the new space and Goliath looking in wondering why he can’t play in there any more.

Custom Braided Alpaca Reins

No they aren’t reins for the alpaca but for your horse!  I’ve made several reins for folks and my latest pair is probably my favorite.

Colors are brown and cream though the lighting in the picture took away the true look of the colors.  These reins were my first order for a flat braid instead of a round and boy are they comfy.  Great choice if you ask me and I like the pattern the braid gave.  The reins look like a classic horse hair braid but are baby soft instead of course and itchy. 

I left the fringe on this pair when I back braided it.  With use it should fuzz out and make a nifty accent.  The cool thing is if you decide to don’t like the fringe all you have to do it cut it off and dap with fray stop and you have a finished look.

As always don’t forget to check out AlpacaFarmGirl!

==============================
1/22/10
I am awaiting the arrival of my new cord making machine so I can make the following without taking hours and hours to make just one!
– alpaca mecatet
-alpaca reins
– alpaca leashes
– alpaca show lead ropes for both horses and alpacas
– alpaca dog collars and more
==============================

Backhoe Gardening

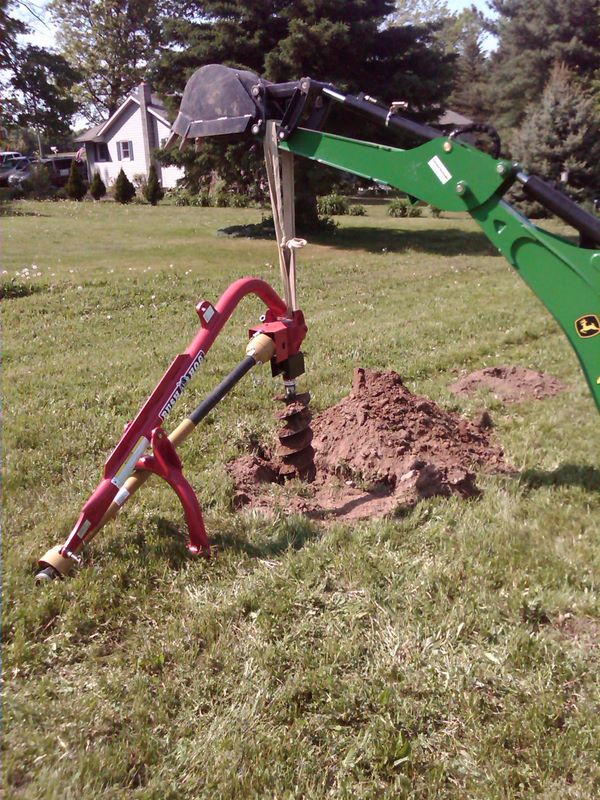
It’s Memorial Day weekend and hopefully we don’t get any more frost warnings so it’s time to plant the garden.  Hmm, garden, that requires a tilled area in which to plant. This presents a problem because we don’t own a tiller but we do have a wide variety of implements for our tractor that should accomplish the task of removing sod and breaking up the soil.

So what to use? Bucket on the tractor to skim off soil and dirt box to break up the first few inches?  Nope, did that last year, that’s old news.  2 bottom plow? Can’t too close to the fence.

Ah ha! Backhoe!  Dig a 4’ hole, dump sod in hole and fill back in.  Yup, that sounds a heck of a lot more fun!


Installing a fence (Part 1)

Day 1 – Measuring

The most difficult part of installing a fence making sure you get a straight line.  We have a flag lot so and our house is in the center of the property so we drive down ¼ mile of our fence line every day.  Another 400 feet of the fence backs up to the backyard of our neighbors and it’s something they will have to view every single day.  This means installing a fence with a very straight line that is esthetically pleasing for both us and the neighbors. 

Time to get out the survey map!  Chances are when you bought your property a survey was done and you should have gotten a map that gives you measurements and locations to all the survey markers.  We found our markers and punted a T-Post in at each one so it would be easy to find.  If the T-post was at the property line of the neighbors we were nice enough to put a 2”x2” vinyl sleeve and painted it hunter green so it wouldn’t be ugly.  Some of our neighbors even used those posts to mount bird houses on which the blue birds just love.  

We wanted a lane all the way around our pastures so we measured out from the T-posts our lane distance of 25’ and put in a stake.  We did the same for the top line to find the top corner posts.

This sounds like easy work but took a full day! The fun part of this story, while we were drilling the holes the following day one of our neighbors came over for some composted manure and we got to talking about the fence.  Comes to find out he’s a professional surveyor!  :o) Next time we need a 400’ straight line we know who to call!

Day 2 – Marking the posts

With all the measuring from the previous day we finally could mark where our posts were going to go.  Plan first; a 6 strand high tensile fence needs bracing at the corners. Spacing for the corner posts is 8 feet and then we decided to have a 10’ spacing for the posts.  With high tensile fencing you can go as far as 30’ between posts down the line if on flat ground. We are hilly and want to have our top line be HorseRail which requires a 10’ space between posts.

Once all the flags where in where we plan on putting the posts we took out our guide line.  If you use a post pounder you can keep the guide line in but we use a post hole digger so it needs to be removed.

From this point on the project moves pretty quick. Drill the hole, drop a post, tamp it in and repeat.  WNY is in a bit of a drought but there’s rain coming so we decided to drill all the hole, put the posts in them so no one would get hurt falling in a 4’ hole and will tamp them in after the rain comes. Note: corners need to be cemented in! You’re talking about 200psi per line when under tension so be sure to make the corners right the first time.  High tensile will not show rust for 50 years and with pressure treated posts this fence should last you your whole life with minimal maintenance.
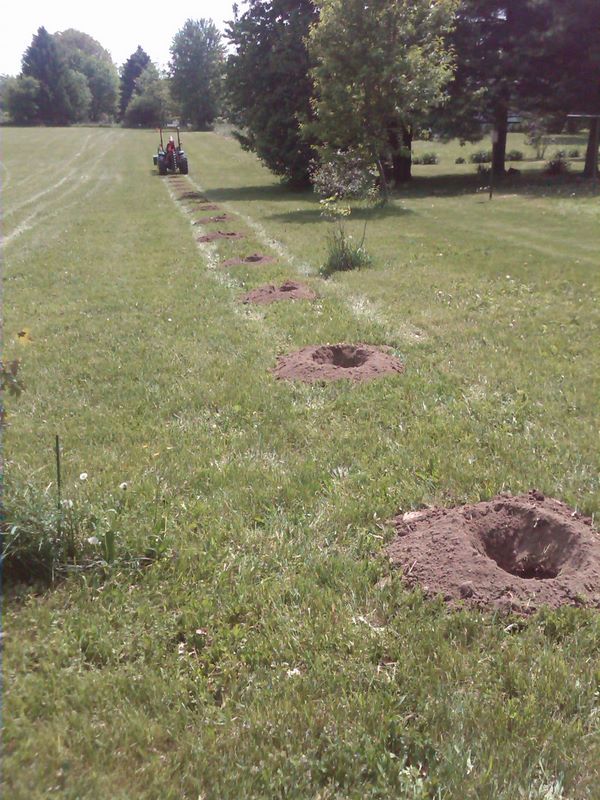
Post Hole Digging Fun: Half way through our line we hit a pretty big rock and the auger got stuck.  Usually this isn’t overly exciting.  We put a pipe wrench on the auger and back turn it out of the hole. This time it didn’t work.  Push or Pull that auger wasn’t budging. Out came the backhoe! We had to dig a hole next to it and yank out the poor PHD.  Good news, no damage and we finished the line by the end of the day like planned.
Tablet Weaving

I’ve always enjoyed braiding and have made many items out of alpaca by spinning the yarn into cord and then using different types of braids to make rope, leads, collars, reins, etc.  What I love about braiding is the speed.  In about an hour I can have a finished product.  The drawback is the ability to have patterns. I’m confined to solid colors, a random color insertion or stripes.

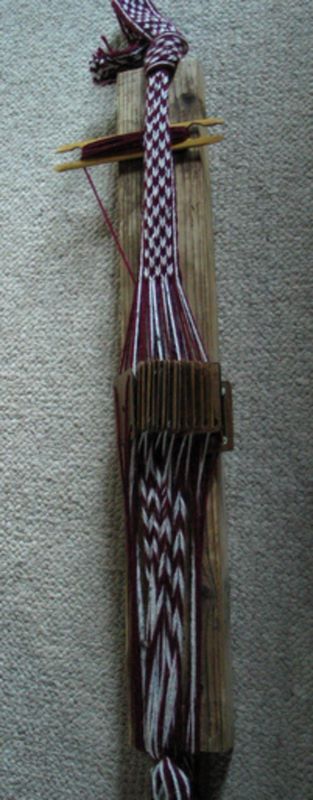
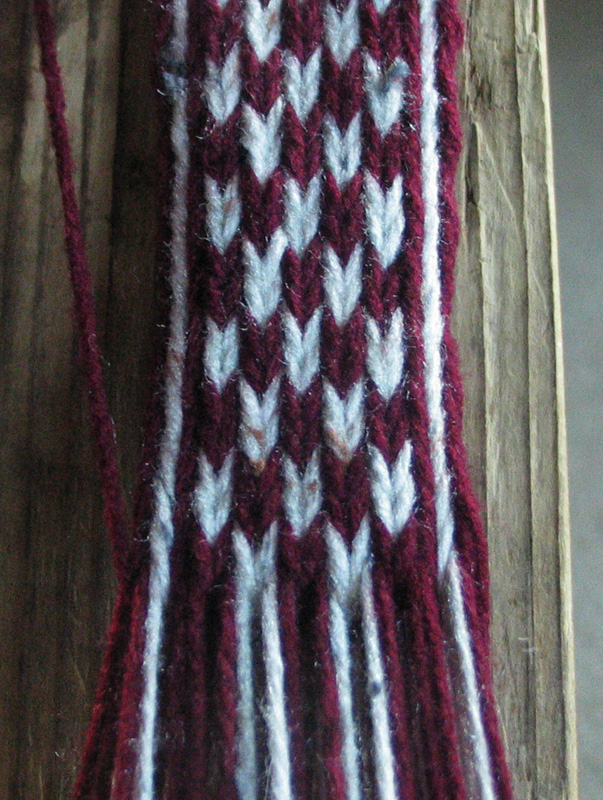
Always thinking about other ways to use my alpaca I came across tablet weaving.  The tablet weave has been around for 100’s of years and is the basic form of weaving.  You can use any type of fiber like, silk, cotton, wool and yes alpaca.  What I like about tablet weaving is the ability to insert patterns and more colors into your work that braiding can’t do.  I’m currently learning how to make a simple checker pattern as you can see from the photos. 

Tablet weaving is a slower process.  With the pattern I’m currently working on the most time consuming part constantly having to untie and take out the twist that forms in the tail.  I think I’ll be working on a better board with some swivels that will take out the twist as I weave.  Other patterns involve a forward and back movement of the cards so a twist never builds up making the weave faster.

To learn more about tablet weaving here are the 2 sites where I learned the most.

http://www.stringpage.com/tw/basictw.html
http://www.lindahendrickson.com/

UPDATE! Visit our Warping Your Mini Loom Post

Don’t forget to visit Alpaca Farm Girl’s Fiber Arts Friday!