Understanding Cost to Sell Alpaca Fiber at a Profit

AlpacasWhether you’re thinking starting an alpaca farm or are a seasoned rancher the question is always the same.  What do you do with all that fleece?!  I’m surprised to find that many folks shear it, bag it, and store it without doing anything at all.  (FYI Fiber does have a shelf life).

Since many folks frown upon eating alpacas the only ways to cover your cost of ownership of these animals is to sell fiber, products or breeding stock.  Yes, you CAN make your alpacas pay for themselves with fleece sales but only if you manage your farm properly.

Alpaca ownership is first and foremost a business. As with any business you have to realize what your costs are and work on lowing them to realize a profit.  Here are the key factors:

  1. Location: Alpacas eat grass which for the most part is free! That is unless you live in an arid climate then you have to spend $$$ on hay.  Money spent on hay is money out of our pocket.  My alpacas are grass fed 6-8 months out of the year. Yippy, FREE food!
  2. Feed: There’s no substitute for good pasture management.  A good pasture with quality forage is everything that an alpaca needs to thrive.  I do not grain my alpacas unless I have a pregnant dam that is skinny and needs help maintaining weight.  For 6-8 months out of a year I am able to “feed free” so to speak on quality pasture alone.
  3. Supplements: Since the pasture is supplying all of the feed it is important to know what vitamins and minerals you may be lacking.  Soil samples will help you decide what to supplement. We are low in selenium in my neck of the woods and I’ve opted to offer free choice Dumor Sheep Mineral to all of our alpacas since it contains the minerals I need at a very affordable cost.
  4. Water: Offering quality fresh clean water to drink is another key.  Keep your animals hydrated especially in the winter.  Heated buckets in winter are a MUST.  Hay is dry and alpacas need water to help the digestion process. Alpacas will not drink enough water if it is frozen or ice cold. The cost of running a heated bucket is minimal to what a vet visit will cost you should they colic or become anemic.
  5. Worming ,Vaccinations, General Health: You can save $ by giving shots yourself but in some states (like NY) only a veterinarian can give rabies shots.  Also learn how to clip toenails, trim teeth, run fecals, do blood draws, etc yourself. The more you empower yourself the less you pay your vet.
  6. Shearing: Finally, what does it cost you to get the fiber OFF the alpaca?

Calculating Cost per Pound and Ounce:

Most of us will sell fleece by the ounce or by the pound so when you’re figuring your costs you want to know what your costs are in terms of costs per ounce or costs per pound of fleece.  I narrow this down to what it costs to care for 1 alpaca per year.  That way when I weigh out the usable fleece I know what that alpaca costs me in terms of fleece weight!

Here are my 2010 and 2011 calculations for yearly cost per alpaca.  Last year I had a herd of 9 this year I’ll be up to 16.  In most cases the cost of care per head goes down with more animals you own.

2011 Projections (2010 in RED)

6 months Grass: $0
6 months Hay: $17.5 ($33)
Grain: $7.5 (same)
Minerals: $1.25 ($2.5)
Syringes: $2.5 ($3)
Wormer: $6.5 ($10)
Rabies: $2.25 ($21)
Heated Water: $1.25 ($2.20)
Summer Fans: $1.25 ($2.20)
Shearing: $5 ($30)
Teeth: $0.25 ($10)
Misc Vet: $10 (same)
———————————-
Total: $55.25 ($123.90)***

***This is the cost to care for 1 alpaca on our farm per year.  This does NOT include other factors of running a business like property tax, gas, hardware, equipment, travel, etc.  I include those factors in my Mark Up % when pricing products since I retail more than just alpaca fiber. Read More About Pricing Products Here

So what does 1 ounce or pound of fiber cost you?  Co-ops, commercial mills, and other companies that purchase your fiber will only want the best quality.  Outside of breeding for better fiber it is very important to handle it properly after shearing to maximize your yield.  Skirt the fleece removing all large vegetable mater, discolorations and guard hair.  Then bounce on table or tumble to remove small debris and dirt.  Dry your fleece in an open bag next to a dehumidifier for 24hrs before weighing.

This clean dry weight is your prime sellable fleece.  I’ll typically get 3 to 6 pounds of high quality fiber per alpaca.  For the purpose of this exercise let’s use the average of 4.5lbs. For comparison the average sheep will produce 7.5lbs of fiber but 40-50% of that weight is grease.

Prime Raw Fiber

4.5lbs = $55.25 ($123.90)
4.5lbs = 72 oz
Cost per oz = $0.77 ($1.72)
Cost per lb = $12.28 ($27.53)

As you can see small changes in your heard management practices can make a big difference in your bottom line. Here are the changes we are making to lower our costs from 2010 to 2011

6 months Hay: Moving from feeding small square bales to large rounds
Rabies: vaccinating whole herd vs only those that are traveling (required by NYS)
Shearing: Cost of me shearing vs hired shearer
Teeth: Cost of me trimming teeth vs hired shearer

Processing and Selling Your Fiber

Most people do not buy fiber from you in the “raw” state but are more apt to purchase fiber as roving or yarn so let us also look at those costs (less shipping).

Cost/lb at a NY mill (total with costs added from above)

Roving/Bat = $12.50 ($24.78 $40.03)
Pin Drafted = $15.50 ($27.78 $43.03)
Yarn = $26.75 ($39.03 $54.28)

Cost/oz at a NY Mill (total with costs added from above)

Roving/Bat = $0.78 ($1.55 $2.50)
Pin Drafted = $0.97 ($1.74 $2.68)
Yarn = $1.67 ($2.44 $3.39)

Fiber Pools and Co-ops

Another outlet for your fiber is to send it off to fiber pools or co-ops.  At these places your fiber is combined with those of other farms into large commercial runs for products like socks, hats, yarn, blankets etc. These pools and co-ops willthen allow you to purchase product back at or below processing costs and in some cases will pay dividends back to their member in profitable years.  Examples: NEAFP and AFCNA

Alpaca Blanket Project

This company started a few short years ago and has grown considerably.  They are now able to offer up to $5 per pound for your raw fleece.  Members can also purchase blankets back at a discounted rate.

Selling to Mills Directly

Many small cottage mills will purchase alpaca fiber directly but at a price/lb.

Large production commercial mills have also started purchasing alpaca fiber from North American ranchers but only beige or white fleeces.  I know alpacas come in 22 different colors but it is the light colored animals that will be called for in commercial production.  If you don’t believe me visit the herds in Peru some time…. All beige and white.

Scrap Fiber

All the calculations above are based on “commercial” prime quality fiber; fiber that you can sell to mills and manufacturers directly. However, a typical alpaca will yield 9-14 pounds of fiber over all so what to do with all the other fiber?  I consider sales of this fiber to be a bonus and there are MANY outlets for it, here are some of the things I do with my neck, leg, and belly fibers.

Rugs and Rug Yarn – Mills are now offering rug weaving and rug yarns.  Mix up a bag of skirted scraps (2” or longer) for a colorful rug yarn that can be woven, crochet or knit into soft bath mats or have the mill make the rugs for you.

Felt – Purses, bags, hats, coasters, rugs, pillows, dog beds, comforters, artwork and more.  Wet felting fabric yourself or having the mill do it for you can open up a whole new world of possibilities.  Be creative!

Stuffing – We all have the “garbage” bag where all the shorts and swept up scraps go to die. This too can be used.  Fill up suet feeders or chicken wire cage with fiber scraps as a nesting feeder for spring birds.  Wash and dry scraps to remove smell and use these unsavory pieces to stuff dog toys.  My dogs go NUTS for alpaca stuffed toys.

Conclusion:

As the inflated price of alpacas comes down to sustainable levels the majority of alpaca farms will soon be looking to cut costs and breed for fiber profitability.  With hard work, conservative planning, artistic ability, marketing and salesmanship; the cottage and commercial future of alpaca fiber will thrive.

Fiber Arts Friday – How To Weave On A Peg Loom

Peg Loom Scarf
Hello Fiber Arts Friday, Crafty Friday fans and DIY Craft Linky!

As promised here is the tutorial on how to make and use a peg loom! (video at end of post)

Peg loom or peglooms are a popular fiber art in the UK but I could not find any information readily available in my internet searches on how to make or use this easy tool here in the states.  So, I figured I’d make my own.

The concept of a peg loom is very simple; it’s just a board, with holes drilled in it with pegs put in those holes.  Here’s the materials list I used to make my loom.

–       2×4 board (at least 3ft long if you plan on making rugs)
–       (4) 7/16 dowel
–       Measuring tape and pencil
–       Hand saw
–       Cordless drill
–       1/2 inch drill bit and a small bit just large enough for yarn to be thread through it 
–       Weaving material – bulky yarn, roving, fabric strips or even raw fiber

Cut your dowels down into 6” pieces (should get 36 out of 4 dowels)

On your 2×4 mark a spot in the center of the board every 1 inch, this is where you will drill holes (36 holes in all).  If you’re using a different sized dowel the rule of thumb is do double the diameter of your down to get the measurement to mark for drilling. 

Next start drilling where you marked.  Test your depth on the first hole by drilling down a bit and then putting the dowel in so it wants to stay in the hole.  Usually ½ – ¾ depth.

Next put all your dowels in the drilled holes and mark with your pencil where the dowel and the board meat.  Remove the each dowel and with a small drill bit drill a tiny hole about ¼ inch above the marked line.

Your Done!

Warping your Peg Loom

First determine the width you project will be.  For the scarf in the video I’m using only 3 pegs.  If you’re making a rag rug or a wool rug this loom can make up to a 3 foot wide rug!

Next choose your warp material.  Your warp will not show in your finished project unless you want to use it as fringe at the ends.  Your warp threads will need to be double the length of your finished product plus a little extra for fringe or to be used to tuck in.

Thread each peg with your warp and place the peg in its hole.

Weaving material can be anything from raw fleece locks, roving, rag stripes or even chunky yarns. (I’ll do a tutorial on using raw fiber at a later time when I get more fluff off my alpacas)

Weaving on your Peg Loom

To start off make a slip knot and place it over the first peg.  Weave in and out of all the pegs, when you get to the end come around the last peg and weave in and out the way back. Continue until your pegs are full.

When pegs are full pick up each peg and push down the weave onto the strings and replace the peg, repeat with the remaining pegs.  

Wash, rinse, repeat, LOL.  Yup that’s it keep on going it’s that easy.

When you get to the end tie off your last bit to the end peg.

Warp strings should now be knotted.  Tie the first (3) strings together on each end and then every (2) strings in the middle.  This will prevent your work from falling off the end.   Do the same on your finished end.

You can choose to leave your knotted warp strings as fringe or you can sew them up into your project.

Here’s the video of the peg loom scarf from start to finish.  Don’t worry I go hyper fast 12x through most of it so my 1/2 hour scarf fits in this video.

Fiber Arts Friday – Picture Frame Looms

Welcome Back Fiber Arts Friday and Crafty Friday Folks

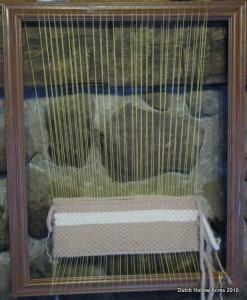
Sticking with my theme from last week I’ve been researching homemade looms and decided to try one of them out.  I picked a simple picture frame loom to start with and though the loom is simple apparently the technique for use is not.

Picture Frame Loom Attempt 1:

I found an old frame in my basement, knocked out the glass and said goodbye to the ugly hotel art that was in there and got to work.  The warp is VERY simple.  Take your string/yarn and wrap the loom on the longest side.  Wrap as wide as you want your end project to be and space the yarn about ¼” apart, keep tension taught and even.

Weave your fiber of choice over under all the strands.  Because there’s a space in your warp thanks to the thickness of the frame one direction of weaving is very fast and the other direction is slow going having to go over/under on the way back.

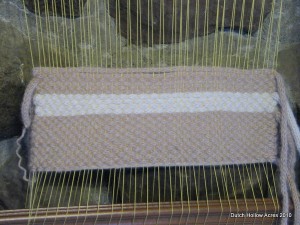
Here’s my work thus far… FAIL.  As you can see I started to cinch the ends too tightly and the bottom of my project is wider than the top. ERRR

Picture Frame Loom

Picture Frame Loom

Picture Frame Loom Attempt 2:

Ok, so I totally ripped apart my project and started again.  This time I decided to try using some dowels to speed the process up.  1 Dowel is fed through the center of the warp to keep it open.  The 2nd Dowel I put on the bottom and used loops of yarn to attach each top strand to the dowel.  That way when I pulled on the dowel all the attached strands would move with it causing a nice little shed row without me having to weave over/under.

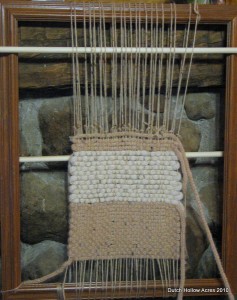
Here’s my new attempt.  Still a fail in my mind but I’ve gotten better with leaving slack at the edges so they don’t taper in.  I was using a fork to pack my rows and apparently I didn’t do that great of a job because they are very loose.  Oh well, I’m still learning.

Picture Frame Loom

Top Secret Loom Project.

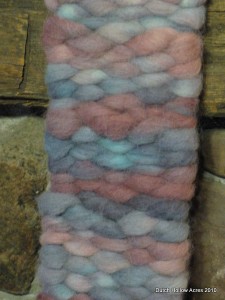
Ok my last loom experiment used a new loom entirely but alas I didn’t have time to document it so I’ll have to leave you wondering how I made this until another post.  I’ll give you a hint though… this type of loom is often used to weave raw wool locks.  For my mini test project in this photo I chose to use some pin drafted roving (available in our shop of course).  I can’t wait to attempt a full scale project on this loom.  I’m going to see if I can use raw alpaca, I’m not sure how well it’ll hold together since alpaca doesn’t have the memory or desire to felt quickly like wool.   Don’t worry, I plan to document the dickens out of this method since it is rarely used.

Weaving with Roving

Last day to enter the Alpaca Sock Giveaway – Drawing is tomorrow 11/13/10

Fiber Arts Friday – Roving Yarn and Hats Oh My!

Hello Fiber Arts Friday and Crafty Friday folks!

What a wonderful week of fiber surprises.  When you send your shearing clip off to the mill often it seems like you’re sending it into oblivion.  Initially you talk to the mill, making sure they know exactly what you want and then you wait.  Depending on the backlog the mill may have you could be waiting 4 weeks or 4-6 months. 

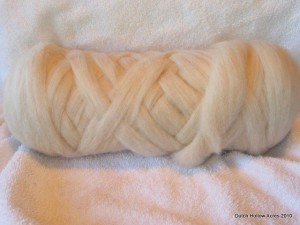
After 5 weeks I came home to find a box on the porch.  I assumed it was my alpaca sock order and brought it in and set it to the side to “deal” with it in the morning.  (Inventory is not my favorite thing in the world)  Come morning I opened up the box and what a great surprise!  13 glorious pounds of alpaca/merino pin drafted roving greeted me though a clear plastic bag.  Yippy!  I have plenty of roving to spin, dye, and sell.  

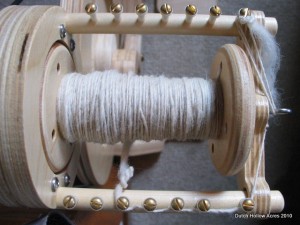
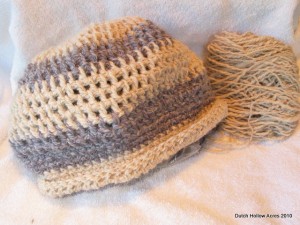
Immediately I took a small 6oz bump and started to spin to get a feel for the roving.  Well I kept spinning morning and that night and plied it up.  Remembering my Wonder Roving that I spun up during the Tour de Fleece I decided to tackle a hat.  I haven’t finished it yet but here’s how far I got. 

I should have the roving up for sale in our Shop this afternoon as well as our new shippment of socks!

AlpacaMerinoRoving

AlpacaMerinoYarn

AlpacaHat

Fiber Arts Friday – Alpaca Fur Blanket

Hello Fiber Arts Friday followers!

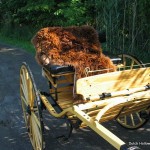
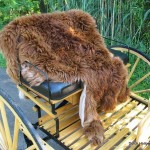
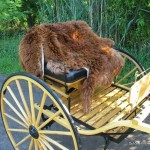
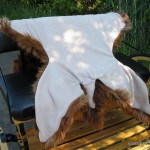
A while back I told you about the unfortunate passing of my alpaca Miracle.  We ended up processing her hide and sent it off to be tanned and made into a lap robe.  Well the good news is our Miracle Blanket is finished!  I picked it up from Sivko Furs, Inc on Sunday and have had a full week to enjoy it.

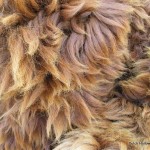
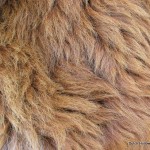
Sivko Furs did an awesome job!  I’m thrilled with the outcome.  The fur is held tightly to the hide and has been brushed clean and is so soft.  Their seamstress did a beautiful job sewing on a soft beige color fleece.  She managed to hide the seam for the majority of the blanket and only a small area at the neck shows her stitching where she had to turn the blanket inside out.

Per my asking she trimmed some of the neck off  A) so we didn’t have a seam in the fleece backing and B) so I had a piece of fur hide to keep and play with for my own projects.  They also included all the other little scraps of hide they trimmed off while making the finished blanket.  Maybe in future FAF posts I’ll show you what I plan on doing with them all.

The look and feel of this blanket really made me think of the old carriage lap robes used to stay warm with on cold winter nights.  Actually the authenticity of such a lap robe isn’t too farfetched.  Did you know in the late 1800’s alpaca was more popular in the US than sheep’s wool?  Unfortunately it was a short lived industry since the quantity needed to keep up with demand wasn’t there and sheep ended up taking over as a preferred fiber.  Check out my post on Alpaca, Fiber of the Presidents for more info.

If any of you who end up in the same situation as I did be sure to read my post on preserving your alpaca hide and I highly recommend the kind folks at Sivko Furs who had a great turnaround time and a very fair price for processing our Miracle.