Dutch Hollow Farming Workout

Spring is here and with it endless hours of daylight which means lots of work is getting done on the farm.  All these new farm chores are quite the work out so, if you’re looking to get into shape here are my recommendations.

  • Warm up – Never just jump right into a workout make sure you warm up your muscles first.  Start by pitching poo! Muck stalls, muck paddocks, muck out the trailer, muck out the track.
    • If done correctly – you’ll have to muck out your shoes
  • Glute to the Max– Shearing season! Great for shaping your butt!  Hours of kneeling and shifting your weight around a wiggling animal puts strain on those glutes!
    • If done correctly you should require the use of a handicapped bathroom stall since you won’t be able to sit or get back up without extreme pain
  • Dexterity and triceps – Lets do fencing! Rotational fence, down fence, new fence etc. – works the dexterity in your fingers as you skillfully wind/unwind miles of tape and twine.  Don’t forget the upper body work pounding in T-Posts and work those wrists as you clip on insulators.
    • If done correctly you should be deaf from the sound of pounding T-posts because you forgot your ear protection. Your hands bubbled up with blisters from pounding followed by stabs and scrapes from broken electric strands.. Your legs should be minced because you though it was a nice warm day and shorts seemed like a  good idea until you hit a brier patch
  • Upper Body – Hay best workout ever.  Pick a good humid day in the 90’s with the threat of rain coming.  Have 1,000+ bales that need to be stacked before they get wet.  Make sure to wear jeans, long sleeve shirt and gloves. NOW GO!
    • If done correctly – oh hell, you’re probably not even conscious the next day or in the hospital for dehydration because beer sounded like a good way to re-hydrate.
  • Core – Riding – it’s not a sport the horse does all the work!
    • If done correctly your abs, butt, arms and inner thighs will tingle for a week.  You will have a distinctive saunter to your walk.
  • Areobic Workout – don’t forget your heart is a muscle too and needs to be worked just like all your other muscles. So get those running shoes on and lets chase livestock because….
    • they just broke out of the fence you just put up
    • they know the vet is coming and they charge by the minute
    • smell of sex is in the air and the boys and girls want a mixer
    • grass is greener…
    • they know you have dewormer in your pocket
    • you have a potential buyer and you just got finished telling them how easy to catch they are.
      • If done correctly – you’re covered in alpaca spit,  slipped and fell into a poop filled mud hole and have a welt on your leg from getting kicked because you weren’t fast enough.

If anyone is interested, our gym fee is $99 for the first 3 months!
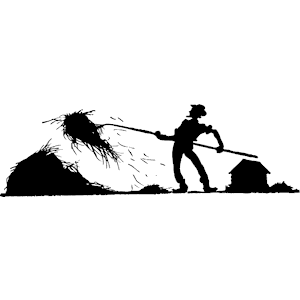
Man_Pitching_Hay


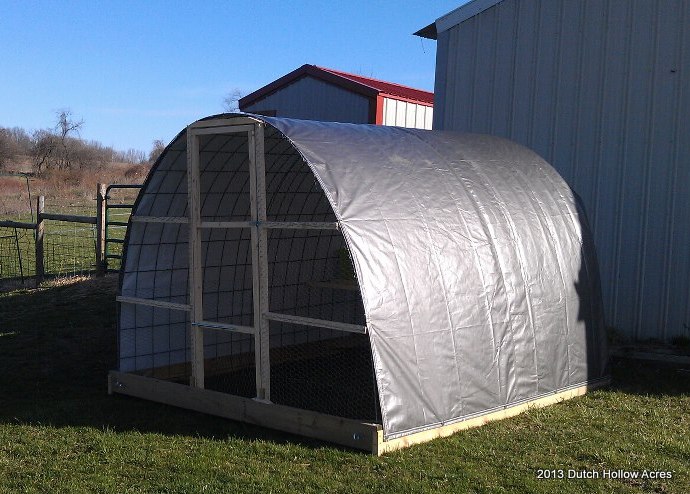
Hoop Coop and Chicken Tractor

Summary: 8’x8′ ft footprint and over 6′ tall! Large, light weight, easy to move with 1 person and about $200 to build!

Hoop Coop


Getting our first chickens meant building our first coop!  I wanted a tractor format but something I could walk into and stand up in.  At 6’2″ I don’t bend over easily and my height meant BIG coop for only 6 chickens.

I found an idea of a Hoop Coop shared by Rain Creek Pottery that I liked and looked like it would suit my needs perfectly.  This hoop coop tractor design would allow my birds the comfort of a large enclosure and access to fresh grass/bugs daily and is light enough I can move it by myself without help.

I’m still in the construction phase and I’m about 70% done!  Here’ my progress thus far, see the Rain Creek Pottery link for detailed photos.

Supply List

  • (2) 2x6x8 – pressure treated boards
  • (2) 2x6x10 – pressure treated boards
  • (2) 50″x16′ Cattle Panels
  • (16) 2x2x8
  • (4) Eyebolts
  • 10×16′ High Grade UV and Arctic rated tarp
  • (4) small baskets (nest boxes)
  • Box of fence staples (medium)
  • Box of fence staples (small)
  • Box of 2.5″ screws
  • Cable Ties
  • Hinges
  • Latch
  • Screen door spring
  • 1″ chicken wire

I cut the 2x6x10 down so there was 2″ beyond the cattle panel on each end an stapled the daylights out of it

I opted to flip the whole thing over before bending so the stapled part would be to the inside of the coop.


The next part was a learning curve.  When putting up your frame make sure the area you’re working on is level!  When I moved the coop from outside to inside the shop for the night I noticed how off my door frame was!  Thankfully it was an easy fix and I found it before I started putting chicken wire up.


Looking MUCH better, frame is up the panels are feeling much more secure and don’t wobble any more and can even support my weigh leaning up against them.


This is where I’ve left off.  Apparently I still am daft and can’t find level but it’s a house for chickens and not for me so it’s good enough for who it’s for.  I’ve chicken wired the back opening, chicken wired the front, the door, 3 hinges used, a nice latch that I can use a snap on to secure easily, and my screen door spring so the door always closes and can’t accidentally be left open.

Inside dimensions are 8’x8′ so it has the potential to house many more than my 6 chicks.

*


Corner bracing.  I used the scraps from the 2x6x10 cut in half as the brace.  Also note the bolt and nut in the corner.. That’s to the Eye bolt so I can hook ropes on to drag it easily.  I opted NOT to use the eye screws because I’ve had issues with them pulling out in years past.  Also note how I kept the cattle panels to the inside of the coop.  This way when they are bent the stress of the panel is not pushing against the staples.


This is how I’ve been attaching the 2×2’s onto the cattle panels.  This photo shows a roosting perch that is angled.


Here’s the finished inside!  Nesting boxes, with 2 roosting areas.

*


Here’s the underside of the nesting boxes so you can see what I did to brace it.  I used 2 screws (one front one back) of each nesting box to secure it to the 2×2’s.


I bought a GREAT UV and Artic rated tarp with rope reinforced seams from MyTarps.com… I highly recommend them, great service, they even found a better way to ship to me and refunded me the difference.  Great customer service and I got a high quality Made in the USA tarp!

*


Close up of how I secured the tarp to the footer boards and to the back using a large washer and screw.  Note, by keeping the cattle panels to the inside of the board this process was very easy and will generate less wear on your tarp!


That’s it!  The coop is done!   Time to drag it out of the workshop and into the pasture.  It’ll be a few more weeks until my chicks are old enough to enjoy their new home.

Speaking of the Chicks… here’s a video I took of them yesterday  They are about 3-4 weeks old now.

Vacationing is Impossible

One thing that I mention to everyone who says they want to raise alpacas or horses is that vacationing is darn near impossible.   If you like to travel DO NOT own a farm.

Case in point:

This past weekend was our anniversary and boy wouldn’t it be nice if we could get away for a long weekend?  Plans were set and preparations to put the farm on “auto pilot” with helpers to keep an eye on things were made.  Feeling darn good about ourselves we left convinced we’d be able to enjoy our time away.

The first night away went smoothly, no calls from back home at all, we were able to enjoy a nice dinner out on the WW Durant.  Earlier in the week we had shipped off some of our alpaca to the chef and he prepared us a wonderful roasted red pepper, mushrooms and alpaca pasta dish.  YUMMY!  It was awesome to have such a great chef prepare our own meat for us and to be able to enjoy a scenic ride on Raquette Lake too.

The next day we recovered from our excess food and drink and hooked up with a friend to go out and see a movie.  Something as simple as going to a movie theater is often difficult and we hadn’t been out to a film in over 2-3 years!   20 minutes into the flick I remembered why.  Ring Ring! Uh oh, it’s the farm watcher!  Dashing to the back of the theater and out the door we answered the call.  The foul weather had blown down some of the fence and though the alpacas were still “contained” they would easily be able to get out.   I walked her through getting some grain and herding them back into the dirt paddock and locking them in.   Crisis averted!

The rest of the weekend seemed to go smoothly and dreams and wishes of a vacation home in the mountains filled our head.   Would it be possible to do these mini weekends away more frequently?   The thought consumed us on our drive home and we had it planned out how we could manage a farm and time off and were convinced we could manage both by the time we pulled into the driveway.

As we walked through the front door we were greeted with a story of how just a short time ago, one of the alpacas managed to cram their body through a small hole under the fence and wiggled their way to freedom.   The tale of how the escape artist was chased and captured retold to the delight of the farm sitter and to the realization there would never be a vacation home in the mountains for me.  *sigh*

Hey Mr. Weatherman

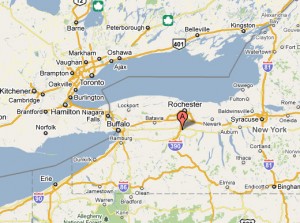
The town I live in is south of Lake Ontario and East of Lake Erie.  These 2 Great Lakes often give us what is called lake effect snow.  In short, the lakes are warm, cold air passes over them picking up moisture and then impolitely dumps it on those of us downwind from the lake.

Avon, NY
That's us!

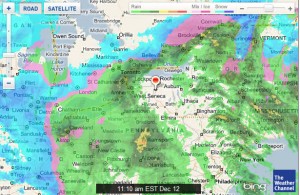
Thankfully the little town I live in is just out of reach of the snows created off each lake.  I like to refer to our weather as the donut effect.  When you watch the weather maps in motion you can see a little donut hole around our town.  We typically miss everything. So, when Mr Weatherman was talking about 4-6” of snow last night with blowing wind (blah blah blah) I totally ignored it.  Why? Let me put it this way.  I’ve plowed 1x all winter yet the City of Rochester just north of me has had over 80+ inches of snow so far this season.

donut_effect_weather
Seriously, this is how our weather usually looks. Our little farm is in a donut hole. From this storm we got NOTHING! Not even rain.

Needless to say when I woke up this morning thinking I had plenty of time for my usual chores list I was in shock to see snow.  Thanks to the wind it wasn’t just 4-6 inches but more like 1-2 feet!  Errrrr!  It’s now 5am and I have to leave in 2 hours to get to work on time. Great.

To complicate my chores even more I didn’t put the new round bale out last night thinking I’d have plenty of time this morning so that was 1st on the to do list; especially since I wanted to test out the new Slow Bale Buddy.  I bundled up, put on my muck boots and bulldozed my way to the workshop.  Of course the blowing snow was a good foot or more up the barn door so I wiggled and pushed and shoveled until I could finally slide the door open. 

Once in, I plugged in the tractor so it could warm up and put the new Slow Bale Buddy in the bucket so I could bring it with me.  I then proceeded to bring in the horses and feed everyone as well as brush off the plow truck and warm it up.

20 minutes later I came back to the tractor and was ready to go get my bale.  Totally forgetting I had the Slow Bale Buddy in the bucket I thought to myself… “self, wouldn’t it be a good idea to use the tractor to clear the snow away from the workshop as I leave?”  Oh yeah, great idea Einstein and I proceeded to clear snow with the tractor. 

It wasn’t until I got to the hay barn that I realized that I just buried my new Slow Bale Buddy under a mountain of snow!  NOOOO!  I went back to look for it but, a new white hay net, in a pile of snow is not easy to find. So I gave up, I guess I’ll just have to use my Bale Buddy again instead.

Hmm. Where is my big green bale buddy?  Oh yeah, buried in the snow somewhere in the pasture. *grumble*  Out I went with the tractor and dug up the bag and dragged it back to the barn for the new bale.  

It turns out maneuvering deep snow in a tractor isn’t as much fun as it seems.  Even with 4×4 the tractor would just slide sidewise or not turn at all.  It was also unnerving when I’d be pushing through the snow in the pasture and then hit a frozen poop pile and get bumped all over especially since I can’t put the roll-bar up.  Mental note, new hay barn needs a minimum of 12’ ceiling, 14’ would be even better.

I finally did manage to complete all my usual morning chores, shovel the walkways, plow the unforgiving long driveway, plow my mom’s driveway, before quickly changing and heading off to work.

As for my test of the Slow Bale Buddy, well, that’ll just have to wait until I find the darn thing in the snow mountain.

Dutch Hollow Acres Trails

Barn Fire Planning and Prevention

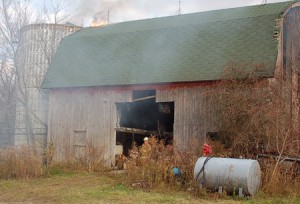
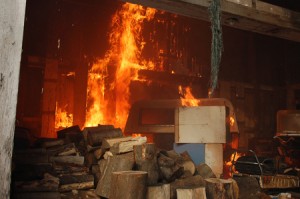
Barn Fire
We’ve all seen it in the news or even know someone who had their barn burn down.  Thankfully many times without loss of life to human or livestock but sometimes with disastrous consequences. So what should you do to help prevent fires and how to prep should one happen to you?

Planning:

–       Fire Department – Get to know your fire department.  Stop over and talk with them about what you can do to make your barn fire safe or what you may need to help them do their job better.  For much of the information in this post I interviewed a wonderful Rochester Fire Fighter named …. Elvis.

–       Space – Your little ½ ton pickup and bumper pull trailer can make it down your driveway and maneuver just fine but can a fire truck?  How about multiple fire trucks?  Keep in mind they are pretty big so keep driving lanes and turn arounds clear of vehicles and overhead branches.

–       Water – Always a problem on farms that have wells.  My well tank holds only 100 gallons at a given time and takes about 30 min to refresh.  Way too slow to put out a fire.  Swimming pools and ponds are a good thing to have within a short distance to your barn should you need them.  Another reason for visiting your local fire house is to let them know what your water situation is and to find out if they have pumper trucks or not.

–       Smoke Detectors – when the fireman I interviewed mentioned this ,my reply back was “but my animals don’t know what that means and I can’t hear it from the house.”  He told me that it’s best to put them in any way.  There’s always the potential you can hear it if outside.  The animals may even act up at the sound and if you’re like me (watching from the kitchen window) you know when your animals are not in their normal “happy” state even if they are showing only passive signs.

–       Fire Extinguishers – Keep one by every entrance to your barn and to the feed room.

  • Extinguishers have expiration dates on them.  They typically will last just a few years.  If your extinguisher has expired replace it.  Your old one may still work but you don’t want to find out if it does or not when you need it.
  • Dry CO2 Extinguishers can fail due to inactivity.  Once a month or so take time to beat your extinguisher.  Pound it on the ground or better yet tip it upside-down and beat it with a rubber mallet. This will aggravate the dry contents so they don’t turn into cement on you.

–       Halters and Leads – You should have enough halters and leads that fit every single animal in your barn and on your property.  Keep them tidy and in easy to find areas.  Not only is this good for fires but for any time you may need to evacuate your farm.

–       Lightning Rods – Self explanatory

–       Emergency numbers – Keep them not only in your barn but also in every single other building on your property.  No good having them I the barn if it’s on fire.  My friendly interviewed fire fighter also suggests knowing the local number to your fire house not just 911.  It could mean getting help to you even faster if calling from a cell phone which is forced to use E911.

–       Evacuation Plan – If you manage to get your livestock out the barn where are you going to put them? On my farm animals all have free access to the barn and are never locked in.  Should the barn catch fire I can easily herd animals away from the barn and into the fields keeping them 100ft away from the barn.

Prevention:Barn Fire

–       Clean barn – Keep your barn free of cobwebs and loose hay or straw.  Dust buildup on electrical outlets could cause shorts too.  We all know rodents will eat through electrical wire so keep a cat around to keep those pests out too. Keep weeds and brush away from yoru barn.  Round-up or string trim everything back.

–       Hay storage – ideally you’ll want to store your hay in another building NOT attached to your livestock area.  However, in WNY many barns have lofts so keep these tips in mind:

  • Most hay fires occur within 6 weeks of bailing.  For the first few months of having new hay in your barn check it daily to see if there is any suspicious heat coming from them.  You will know a bad bale when you feel it.  It will be extremely hot to the touch and steam will come out of it if you cut the bale open.  Use caution and don’t burn yourself when removing bad bales.
  • Air flow – It drives me crazy to see hay lofts shut up tight.  Hay needs to breath… keep the loft doors open.  When stacking hay do NOT stack it right up against the wall.  Instead leave it 2-3 feet away from the wall so that air can move around the bales.  Also, stack the bales up on pallets so air can flow underneath.  More airflow = dry hay which will be less likely to ignite on its own.
  • Clean your hay storage area at the end of every season.  Sweep out old hay and dirt before you put the next year’s hay in.

–       Bedding storage – bedding can burn just as easily as hay… Hello wood pellet stoves! Keep only enough bedding in the barn to do that day’s chores.  If you need an extra out-building to store extra bedding/hay/feed pick up a Garage-in-a-box at Tractor Supply.  $250 for a 12x8x20 holds a lot of stuff and will keep it away from your livestock.

–       Mulch – I would have never of thought of this.  Elvis told me a story about how last year he had to put out a fire because the landscape mulch spontaneously combusted.  I guess I’ll be decorating with rocks from now on.

–       Electrical – In an old barn or even a new one there are a lot of electrical issues that can occur.

  • Cleaning – we already covered this but keep your barn clean!
  • Extension cords – They are meant for one time uses not semi-permanent or permanent solutions.  If you find an area where you are constantly running an extension cord for a heated bucket or light then spend the time and $ to put a proper outlet there.
  • Plug Strips – Same goes for plugging multiple things into 1 outlet.  It is nice to have a plug strip but plugging too many things into 1 outlet can overload the wire which in turn heats up, catches a cobweb or hay on fire and poof, your place goes up like a match stick again.
  • Appliances – When possible unplug your appliances such as radios or coffee pots.  If using heated buckets, fans or portable heaters check them frequently.  Don’t let dust build up on fan blades or dirt get worked into the plug of your water bucket.