Creating a Pasture or Paddock Paradise

The concept of a Paddock Paradise is the brain child of Jaime Jackson who wrote a wonderful book on it.  (buy book here).   The general idea of a paddock paradise is to create an environment for your horse that as closely mimics their natural habitat allowing them to travel distance and obstacles throughout the day instead of standing in a stall or munching on lush pasture.

The paddock or pasture is engineered such that a track or lane is formed around the outside perimeter and when possible includes natural obstacles such as creek crossings, hills, down trees, shade trees and more.  Having a track around the pasture area allows the horses to move from point A to point B taking the longest route possible especially if things a horse wants are spread out within the track.  For example: Hay may be at one point in the track but shelter is at another point, water at another and minerals at even another position.  Your equine friend now has to get moving if they want something instead of just shuffling from one corner of the stall to another or one. 

If you want to learn more about giving your horses a more stimulating and natural environment check out these
Paddock Paradise References:
http://www.paddockparadise.com
http://paddockparadise.wetpaint.com/

Since I have been slowing taking down old fencing and putting up new perimeter fencing I have recently gotten out the graph paper and have been engineering my own paddock paradise (pp) for my small herd.

A little about my set up:

Acreage: 11 total but a little over 3 acres for horse use
Horses: 3 total – 2 mare, 1 gelding
Perimeter Fence: Wood Posts w/Electric Tape top and 3 electric braid rope under that
Mud Paddock: Enclosed with field fence with water/minerals and shelter.  Horses are locked full time in here spring and fall so they do not damage the 3 acre field.

Paddock Paradise Changes:

Track Fence: Step in fiberglass posts with Tape on top and 1 strand of braided rope under
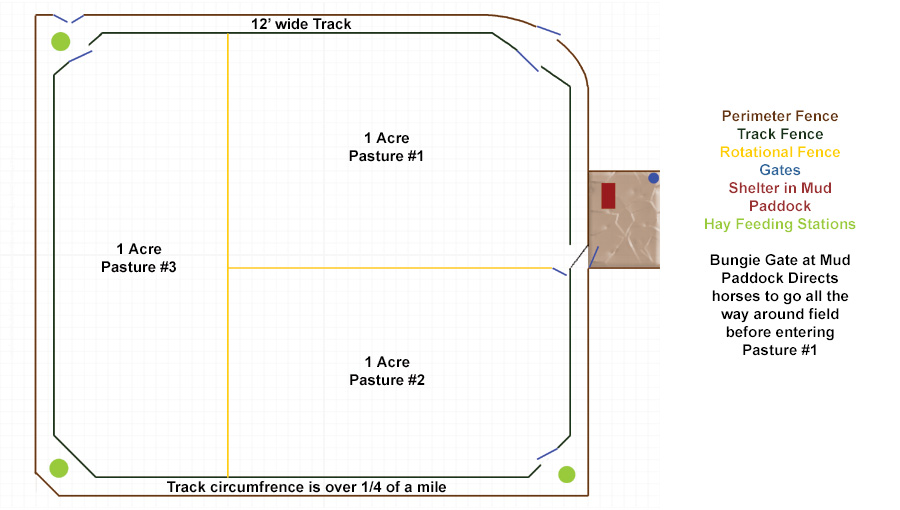
Track: Track will be 12’ wide on the long sides and 20+ feet wide in corners to allow for resting/feeding stations
Pastures: Having a track will allow me to easily create (3) 1 acre rotational pastures with different entrance points for each yet keep my single point for water/mineral and shelter.

Dutch Hollow Acres Pasture Paddock Paradise


 Why am I making these changes?

–       I really wanted to create rotational grazing spaces but didn’t want to have the extra work of having to halter/lead each horse to the new pasture which also meant having to haul water to each of those pastures.  I also would have to be conscious that there would be no shelter in the rotational parts which would make me watch the weather even more.

–       In spring/fall when the ground is wet and muddy my horses are stuck in the mud paddock and stand still for almost a month or more before the ground freezes or dries enough to turn them out.  The track can be used year round and keep them walking by putting hay far away from shelter/water.

–       My horses are FAT! All that green grass with little walking on their part = one fat horse.  If I were to put a GPS on one of them for a day I’d doubt they’d walk more than ¼ of a mile.  Having this setup has proven that horses typically walk 2-7 miles a day on their own vs 1/2 mile or less with traditional paddocks.

–       Simple answer: Cut my work load down while increasing my horse’s!

If you are thinking of doing something similar I highly recommend getting the book.  It helps you a lot in all the planning.  Get out the graph paper and try different layouts for your property and keep in mind that mechanical equipment like trucks, trailers, tractors, mowers have to be able to get from point A to B also.

I’ve also been toying with the idea of doing a similar thing with my alpaca paddocks.  With the lush green grass in WNY I have some overweight alpacas and I’m thinking if I can get them walking more it’ll keep them in a better body score.  If I add areas with stone dust it would also help keep their nails trimmed too!

Again for more information about Paddock Paradise 

http://www.paddockparadise.com
http://paddockparadise.wetpaint.com/
Stocking Stuffer Ideas for the Alpaca Farmer

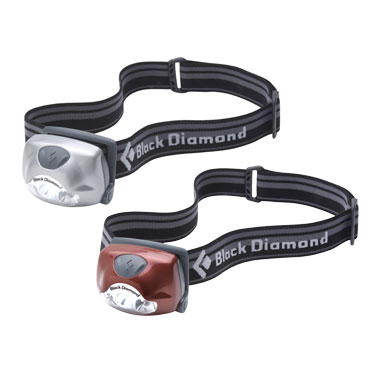
Head Lamp
 Head Lamp  Head Lamp – Perfect hands fee light when you need to illuminate your way around on dark winter nights.
 Yaktrak  Yaktraks – Slip right on over muck boots to give a secure grip on even the most icy surfaces.  No more falls!
   Carabineers or Safety Snaps – I can never have enough of these around.  Help hold gates open, close hay nets, Water buckets, mineral buckets, and a million other uses.  They do break, rust and get lost and is always a “needed” farm item
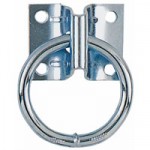
 Hitch Ring  Hitch Rings – What good would a snap be if you didn’t have something to attach it to? These rings work great for everything including your improvised homemade “paca trapper.”
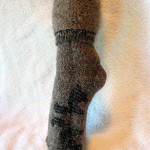
 AFCNA-Extreme-Alpaca-Sock  Alpaca Socks – Yes we may breed the animals and sell the socks but we too would love to keep warm with them!
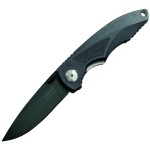
 barn knife  Barn knife, scissors, or snips – Ok alpaca folks, how many times have you gone to go get a bale of hay and can’t find your trusty utensil to cut the twine or snip the wire?!  I must have 4-5 hanging around the barn in various locations and always want more.
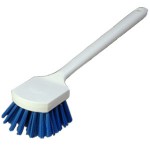
 Bucket Brush  Scrub brush – Hang one next to each and every water bucket you have! Keep your hands dry when doing a dump and scrub in the winter.
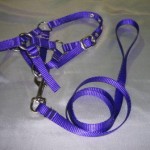
 Alpaca Halter and Lead  Halters and leashes – Technically you should have enough halters and leads hanging next to each stall to accommodate every single animal in that area in case of a fire or emergency.  How many of you actually have that many?
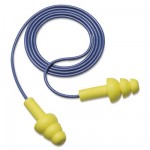
   Ear Plugs – another useful tool that constantly gets lost or is grungy.  You should always be using these when operating any machinery or when pounding t-posts.
 Gift Card  Gift Cards! – Not sure what to get? A gift card to Tractor Supply, Home Depot or Lowe’s is always perfect!

Big Bale Buddy Review – Year 2

Hello again everyone!  Well this is year 2 of using my Big Bale Buddy.  Yes it’s still in one piece with no rips or tears (that I didn’t purposely put there).  Click Here for Year 1 Review

This year I have a new hay supplier and the bales I’m feeding are smaller than the 4×5’s I had last year.  Which means my Large Buddy is too big for my new hay.  Whatever, since my buddy is now 2 years old and is out of warranty I opted to “modify” it to work with my current hay bales.  Well, let me tell you about my experimentation this year.

–       Attempt 1 – I put the “to large” buddy on the first bale and set it out as usual.  The horses almost immediately figured out that the buddy was too lose and pushed it down the bale and proceeded to make a mess. Errrr.

–       Attempt 2 – had me cutting a little hole and pushing a fish tape all the way through the “elastic” part of the buddy.  My hope was to back pull a rope and use that to cinch up the top so it would remain tight.  FAIL. The rope broke and the area was too tight to work in.

–       Attempt 3 – I happen to have a Shires Large Small Mesh Hay Net hanging around. I thought what if I make a slow feeder out of my buddy.  I punched holes in the buddy below the reinforced edge every 4-6 inches or so.   I then used an old nylon lunge line that was missing it’s snap end.  I wove the line though the buddy and then though the net all the way around and secured it with a knot.  After a few tries I learned that you always want to weave feeding the line from the inside to the outside of the buddy and to pull it tight with every weave cinching up the top.

Tada! Slow Feeding my round bale.  It’s a time consuming process though.  About 5 min to get the bale out and put the Big Bale Buddy on as usual and then another 15-20 minutes to weave the hay net into it.

I check the buddy every day to make sure nothing has broken, and that the hay net is still secure and no holes are forming where a hoof could get caught.

Feeding the round hay bale with a slow feeder is totally worth it.  My “naked” 500lb bale with 3 gluttonous horses only lasted from Sat – Thurs, 6 days.  My hay mesh modification extended the life from putting the bale out on Saturday and not having to put another one out until the following Tuesday.  That’s 10 full days AM and PM of the horses eating off of it.

If I am doing the math correctly; 500lbs over 10 days = 50lbs of hay per day being consumed vs. 84lbs being consumed per day without the saver.

NEWS UPDATE:  Of course just after I figured this whole slow feeding thing out the folks at Buddy Inc have come out with a full size slow feeding hay net that covers the entire round bale and even large square bales.   I think I’ll purchase one and test it out and give you all my 2 cents about it!


Farm Weekend

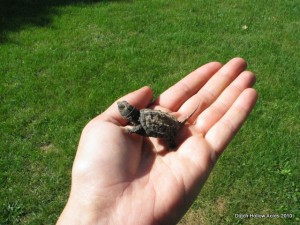
I thought I’d share some photos from our weekend.  The greatest find was a baby snapping turtle who was trying to get out of the trench M. dug for our utilities.  It was a bit of a surprise since the turtles seemed to have laid all their legs in my garden on the other side of the property.  Makes me wonder how he ended up in the trench.
Our new kitten Frito in a basket.
Baby Snapping Turtle
Very wiggly snapping turtle
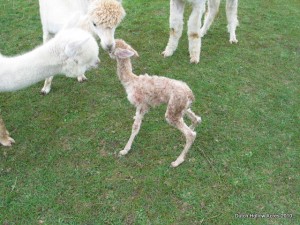
Dutch Hollow's Parcella D'oro
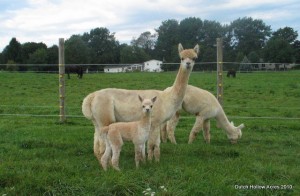
Vanilla and Parcella with Albina in the background

Fiber Arts Friday – New Fiber

Welcome Fiber Arts Friday and Crafty Friday Folks.

I haven’t been overly fibery this week because of some big projects and unexpected surprises.

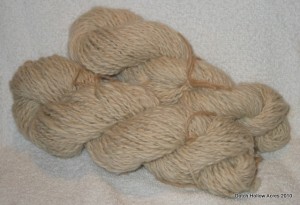
Let me start off with what I did manage to do. I got 2 skeins spun up of my alpaca/merino. Nice bulky 2 ply ready for a hat or thick scarf.
If you saw my post earlier this week about our Labor Day projects you’ll know why I haven’t been able to keep up with my usual Fiber ADD self. Sometimes even I have to get down and to “real” farm work.

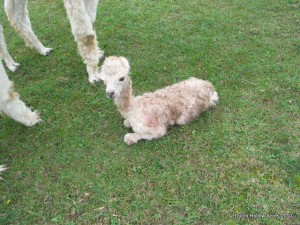
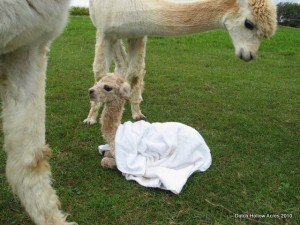
The other surprise this week was the arrival of a new cria. I had come home on Wednesday to meet up with the UPS freight guy and noticed an extra body in the girls pasture! Vanilla had her cria 2 weeks early. I rushed inside, got towels and of course my camera and went out into the field to meet our newest member. I got to work drying off the cria and about 2-3 minutes later it dawned on me I didn’t check the sex. IT”S A GIRL! I was totally thrilled that A) I was home B) the cria, though early, was healthy and strong and C) it’s a girl! D) I got the color I wanted! Yippy!

At 13.6lbs she was a bit small but stood up within the hour and started to nurse and mom had LOTS of good milk/colostrum ready to go. Since she was a bit early one of her ears is a bit folded still but it should correct itself in a few days. Otherwise she’s beautiful in every way and I can already feel the superior density in her fleece which is exactly what I was breeding for.

Well if I think about it, maybe I was fibery this week by welcoming new fiber animals into this world.

Lastly name.  I think we decided on Dutch Hollow’s Parcella D’oro  (Parcel of Gold) Play on the fact the only reason I was home was because of a UPS delivery 🙂