Fiber Arts Friday – Cat Hair Yarn

Hello Fiber Arts Friday and Crafty Friday Folks

A good friend of mine dropped off a Wal-Mart bag of fluff for me on Sunday.  It was labeled simply, Raja.

Raja was a beautiful Himalayan cat and a long time companion who had recently passed away.  Over the years my friend saved everything she brushed out of his long coat.  When he passed away she asked if I would be willing to see if there was anything I could do with all that hair and make enough yarn to possibly crochet a scarf.  Of course I agreed!

The weather has been cold and I sat down next to the fireplace and opened up the bag.  I’m not sure what I was expecting but a bag full of matted cat hair was not it. At first I actually attempted to detangle each clump by hand before carding. FAIL.  What I found out actually worked was to use the carders themselves to pick the mats open.  I would grab a clump and briskly rub it across the comb and little by little the fiber would start to stick to the carder and open up.

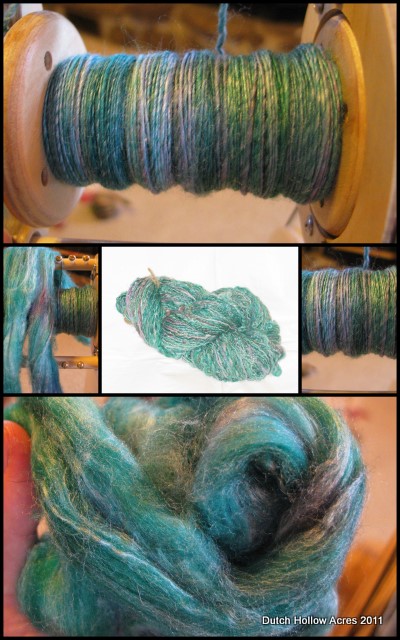
The cat hair by itself actually seemed rather dull in luster so I opted to blend in some tencel to help liven it up just a bit.  I didn’t want to go too over board but I think adding it really helped.  Not only did it give the fiber luster it also helped add some length since the cat hair was only 2-3” or so and I’m terrible at spinning shorts. 
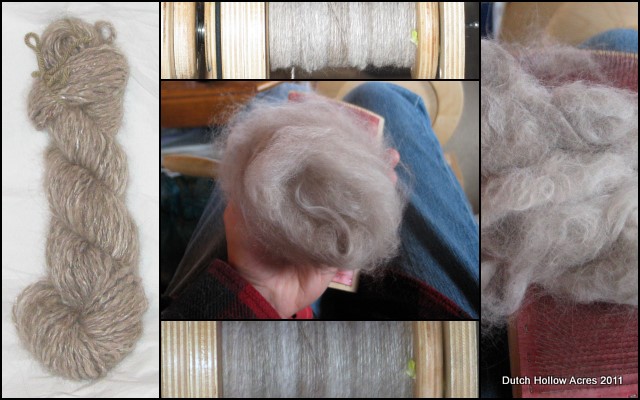
Cat Hair Yarn

Surprisingly the cat hair spun up really nicely.  It short drafted really well and I was able to get a rather consistent thickness and twist. It plied just as well and I think only 2x did I break a strand because it was too loosely spun.  No problem though, just rub the 2 ends together in your hand with a little spit like Wonder Why Gal taught me and poof, problem solved.

So far I have ~100 yards of 2ply spun up and I’ll be working on more this weekend.

Speaking of this weekend… if anyone happens to be in the Rochester NY area I will be doing a spinning demonstration at the Cobblestone House at the Mendon Ponds Winterfest.  Spinning not your thing? There also are horse drawn sleighs, dog sled racing, and the ever popular snow shoe race.  The snow shoe race looks ridiculous, like adults running in swim flippers.

I participate in….
Photobucket

Fiber Arts Friday – Resolutions

Welcome Fiber Arts Friday and Crafty Friday Fans.

It is 2011 and with it brings the dreaded New Year’s Resolution.  I made a few resolutions this year related to fiber. 

  1. Learn to knit
  2. Hand paint roving
  3. Learn to ply with thread
  4. Learn to spin beaded yarns

Sounds like a pretty extensive list doesn’t it?  Would you believe in 1 weekend I did every single one of those items?!  

The Christmas holiday flattened our household with the stomach bug and then a cold.  For a solid week everyone was bed ridden and by the time we started to feel better our boredom could be contained no more.  My mother-in-law(M-n-L) and I went fiber crazy!

Spinning

I had gotten some beautiful merino/bamboo/nylon blended roving from the “roving of the month” club I’m in and while I was still in a fog I spun it up into a thin single with plans of just plying it onto itself for a simple 2 ply.  However the colors wanted more than just a simple ply they wanted pizzazz!  It called out I want GOLD I want Glitter!

The only way I could think of adding some bling to the work was with beads and gold thread. With the help of M-n-L we beaded up some thread and swore a lot plying it into the yarn. 

It was so beautiful, I say was because I learned the hard way that with metallic thread you do NOT set the twist.  The second the yarn hit the water the threat went nuts and twisted up onto itself. *sigh* I would be disappointed but the yarn still looks great and even more unique with all the gold thread bits sticking out of it.

Beaded Yarn

Dying Roving

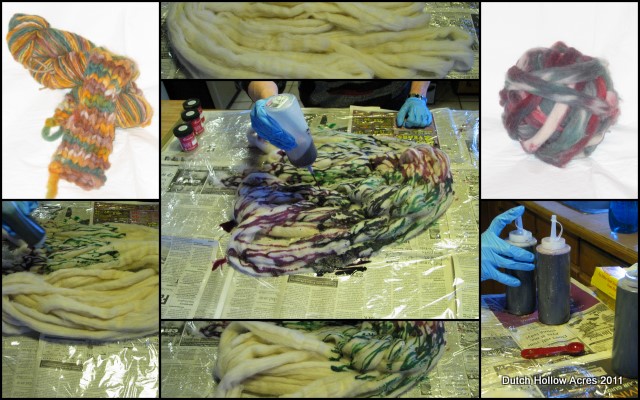
After the above spinning project I wanted to do more and M-n-L never dyed roving or yarns before so it sounded like a fun project to do.  I weighed out (2) 4 oz portions of roving and each of us got to paint away.  We opted not to wet the roving first so it would suck up the dyes better and not make even more of a counter mess. The end result? A whole lot of fun an laughing.

Hand Painted Dyed Roving

Knitting

Sunday came and the though of having to go back to work hung over the household.  M-n-L was knitting away on a sweater she was making out of yarn she had gotten for Christmas and I asked if she would teach me to knit.  Sure!

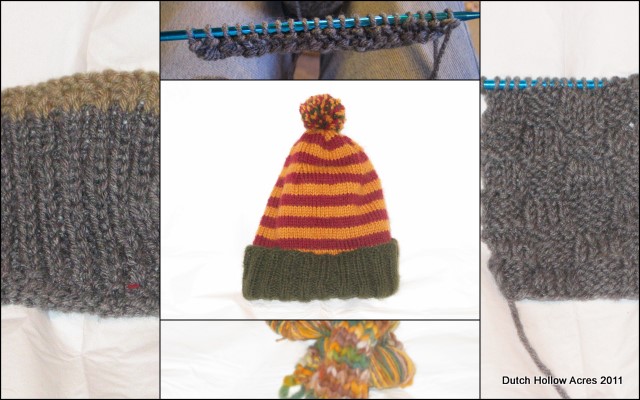
She taught me the “English” way and the general technique and sent me off to my own accord.  Immediately I hated the way the needles felt in my hands and worked them around until they felt better and started knitting.  As I was plodding away M-n-L asked what I was doing because my needles were flying away.  I guess I was a fast learner and ended up teaching myself the German way of knitting without knowing it.  After a few test patches I decided to tackle a full project.

I had gone to my local Yarn Boutique and picked up some Merino/Camel blend and it just called out to me “Hat.” So a hat it became. Tada!

I learned how to knit

Well that wraps up my week.  Crazy huh?

What did you do?

Fiber Arts Friday – The Holiday Rush

Welcome back Fiber Arts Friday and Crafty Friday folks.

This week has been spent mostly with work.  Unlike most folks, the life of a geek gets crazier around the holiday’s when everyone else gets time off.  Something about people hate being without their precious internet so they make us all work when they’ve left to play and aren’t using it.  So, I hear by send out a Christmas salute to all my fellow tech heads who are buried in work like I am.

What did I managed to do with the little time I’ve had to myself?  I worked up some cord and braided this beautiful pair of reins.  Best part of this latest braid is that it is 100% alpaca and machine washable since I preshrunk the cord.  I have them up for sale but really have been eyeing them up for myself instead.  If they don’t sell by New Years I might have a Merry Christmas gift.

Alpaca Braided Mecate

I also managed to spin up some alpaca/merino/tencel that I plied and dyed.  I’d show a photo but it’s a gift so I don’t want to spoil it if someone gets nosey.

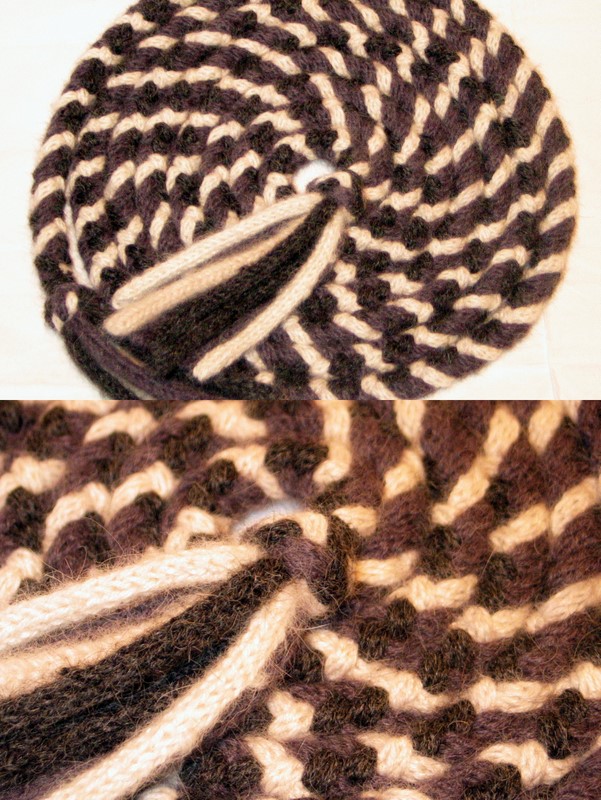
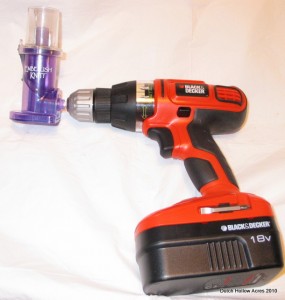
Lastly my hubba made me a great little tool for my fiber fun.  Ive been using the as seen on TV Embelish Knit to make knit cord for rugs and really thick yarn projects but its slow.  M kept watching me a little at a time make batches of cord and said, “wouldn’t it be nice to have that motorized?”  So he went out to his shop with my Embelish Knit in hand and worked up a metal attachment so I could hook up the devise to my cordless drill.  The result?  Fabulous, it’s so fast and easy to make cord now.  My only slow down now is having to stop and wind up the cord and then continue on.  FYI, the beautiful cordless drill? My birthday present from M, isn’t he awesome?

Embelish Knit Drill

 You’ve seen this knit cord in past projects I’ve done as in the “Loom and Skein” post.

Rug Loom

Fiber Arts Friday – Sock Brigade

Welcome Fiber Arts Friday and Crafty Friday Followers.

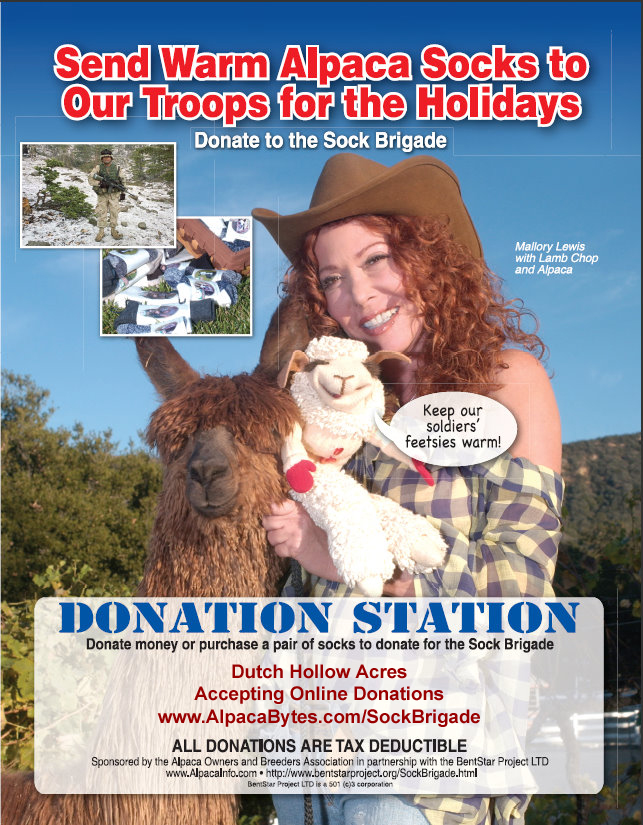
This week I’m dedicating my post to the men and women in uniform serving this our country.  Many folks when they think of the mid east think desert and hot dry climate.  But they have winters too and because it is an arid climate their winters can be just as cold as back home.

As a member of the Alpaca Owners and Breeders Association (AOBA) I am helping team up with Bentstar in an effort to provide warm alpaca socks to the men and women serving in the military this year.

Now through January 1st, 2011, I will be collecting both money and sock donations which will be sent to the Sock Brigade who will distribute them to those who are on active duty.

Here’s how you can help….

Donate Cash

Donate Survival Socks

Donate Extreme Socks


[wp_eStore_fancy3 id=33] [wp_eStore_fancy3 id=34]

If for some reason you don’t trust me to get your sock or money donation you can directly make your donations to…

Sock Donations Money Donations
 Sock Brigade c/o
Barbara Coleman
18100 S. Hwy. 99W
Amity, OR 97101
 Sock Brigade c/o
The Bent Star Project, Ltd.  (checks payable)
443 First St
Woodland, CA 95695-4023

Or online at

 http://bentstarproject.org/SockBrigade.html


Fiber Arts Friday – How To Weave On A Peg Loom

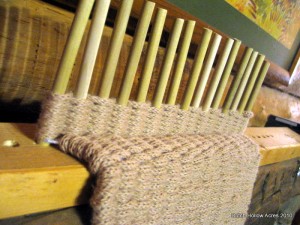
Peg Loom Scarf
Hello Fiber Arts Friday, Crafty Friday fans and DIY Craft Linky!

As promised here is the tutorial on how to make and use a peg loom! (video at end of post)

Peg loom or peglooms are a popular fiber art in the UK but I could not find any information readily available in my internet searches on how to make or use this easy tool here in the states.  So, I figured I’d make my own.

The concept of a peg loom is very simple; it’s just a board, with holes drilled in it with pegs put in those holes.  Here’s the materials list I used to make my loom.

–       2×4 board (at least 3ft long if you plan on making rugs)
–       (4) 7/16 dowel
–       Measuring tape and pencil
–       Hand saw
–       Cordless drill
–       1/2 inch drill bit and a small bit just large enough for yarn to be thread through it 
–       Weaving material – bulky yarn, roving, fabric strips or even raw fiber

Cut your dowels down into 6” pieces (should get 36 out of 4 dowels)

On your 2×4 mark a spot in the center of the board every 1 inch, this is where you will drill holes (36 holes in all).  If you’re using a different sized dowel the rule of thumb is do double the diameter of your down to get the measurement to mark for drilling. 

Next start drilling where you marked.  Test your depth on the first hole by drilling down a bit and then putting the dowel in so it wants to stay in the hole.  Usually ½ – ¾ depth.

Next put all your dowels in the drilled holes and mark with your pencil where the dowel and the board meat.  Remove the each dowel and with a small drill bit drill a tiny hole about ¼ inch above the marked line.

Your Done!

Warping your Peg Loom

First determine the width you project will be.  For the scarf in the video I’m using only 3 pegs.  If you’re making a rag rug or a wool rug this loom can make up to a 3 foot wide rug!

Next choose your warp material.  Your warp will not show in your finished project unless you want to use it as fringe at the ends.  Your warp threads will need to be double the length of your finished product plus a little extra for fringe or to be used to tuck in.

Thread each peg with your warp and place the peg in its hole.

Weaving material can be anything from raw fleece locks, roving, rag stripes or even chunky yarns. (I’ll do a tutorial on using raw fiber at a later time when I get more fluff off my alpacas)

Weaving on your Peg Loom

To start off make a slip knot and place it over the first peg.  Weave in and out of all the pegs, when you get to the end come around the last peg and weave in and out the way back. Continue until your pegs are full.

When pegs are full pick up each peg and push down the weave onto the strings and replace the peg, repeat with the remaining pegs.  

Wash, rinse, repeat, LOL.  Yup that’s it keep on going it’s that easy.

When you get to the end tie off your last bit to the end peg.

Warp strings should now be knotted.  Tie the first (3) strings together on each end and then every (2) strings in the middle.  This will prevent your work from falling off the end.   Do the same on your finished end.

You can choose to leave your knotted warp strings as fringe or you can sew them up into your project.

Here’s the video of the peg loom scarf from start to finish.  Don’t worry I go hyper fast 12x through most of it so my 1/2 hour scarf fits in this video.