Fiber Arts Friday – Alpaca Fur Blanket

Hello Fiber Arts Friday followers!

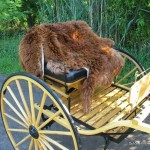
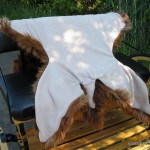
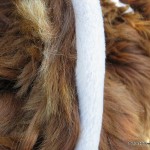
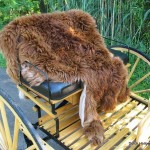
A while back I told you about the unfortunate passing of my alpaca Miracle.  We ended up processing her hide and sent it off to be tanned and made into a lap robe.  Well the good news is our Miracle Blanket is finished!  I picked it up from Sivko Furs, Inc on Sunday and have had a full week to enjoy it.

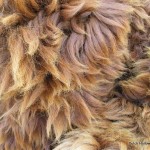
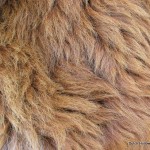
Sivko Furs did an awesome job!  I’m thrilled with the outcome.  The fur is held tightly to the hide and has been brushed clean and is so soft.  Their seamstress did a beautiful job sewing on a soft beige color fleece.  She managed to hide the seam for the majority of the blanket and only a small area at the neck shows her stitching where she had to turn the blanket inside out.

Per my asking she trimmed some of the neck off  A) so we didn’t have a seam in the fleece backing and B) so I had a piece of fur hide to keep and play with for my own projects.  They also included all the other little scraps of hide they trimmed off while making the finished blanket.  Maybe in future FAF posts I’ll show you what I plan on doing with them all.

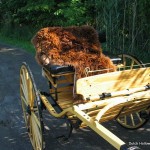
The look and feel of this blanket really made me think of the old carriage lap robes used to stay warm with on cold winter nights.  Actually the authenticity of such a lap robe isn’t too farfetched.  Did you know in the late 1800’s alpaca was more popular in the US than sheep’s wool?  Unfortunately it was a short lived industry since the quantity needed to keep up with demand wasn’t there and sheep ended up taking over as a preferred fiber.  Check out my post on Alpaca, Fiber of the Presidents for more info.

If any of you who end up in the same situation as I did be sure to read my post on preserving your alpaca hide and I highly recommend the kind folks at Sivko Furs who had a great turnaround time and a very fair price for processing our Miracle.
Fiber Arts Friday – Flannel Blanket Pattern

Welcome back Fiber Arts Friday visitors!

I finished my mom’s blanket!  It’s already been washed, and is wrapped and waiting for later this month so I can give it to her.  Too bad it’s the start of summer, she might not get to enjoy it until much later since it’s such a thick blanket. 

A friend of mine really liked the blanket and asked for one so that means I actually have to duplicate it!  Yikes.  So, I wrote down the pattern for myself which means I have a pattern to share with all of you!

Country Flannel Blanket Pattern (PDF) – Printer friendly

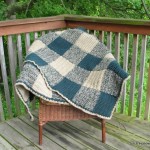
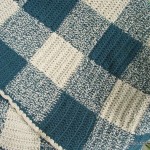
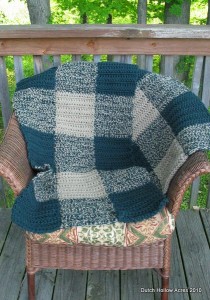
This blanket is made in strips each strip containing (10) 7×7 inch squares and 6 strips total. Finished blanket size will be 6×4 feet. The strips are made by using 2 strands of yarn at once.  It is a very thick and heavy blanket (6lbs) and it works up very fast.  I crochet slowly and the blanket only took me 15 working hours to finish to give you an idea of how fast it goes.

Materials:
(3) Caron One Pound Yarn – Taupe
(3) Caron One Pound Yarn – Forest Green
Size ‘N’ Hook
Size ‘K’ Hook
Darning needle

Strips 1, 3, & 5

Square 1
Row 1 – Using 2 strands of forest green chain a row of 18 with the N hook
Row 2 – DC in 2nd stitch from hook, DC in each stitch to the end, CH 2 and turn (16) Length should measure 7” add/dec stitches if needed
Row 3-? – DC in each stitch to the end of the row, CH 2 and turn (End your square when it measures 7×7 inches)
Last row of square – do not CH2 and cut a 5″ tail off one of your green yarn
(Note: with the exception of the start of the 1st row of the strip, all of your tails will end on the same side of the strip)

Square 2
Row 1
– tie in taupe yarn leave a tail to darn in later – CH2 – DC in each stitch to end of row, CH2 and turn
Row 2-? – DC in each stitch to the end of the row, CH 2 and turn (End your square when it measures 7×7 inches)
Last row of square – do not CH2 and cut a 5″ tail off one of your taupe yarn

Square 3-10
Repeat Square 2 alternating with 2 green and 1 green 1 taupe until all 10 squares are complete

Strips 2, 4, & 6
Follow same instructions above but alternate using 2 taupe and 1 taupe and one green

Darn all your tails into your work and whip stitch the strips together.  Take care to line up the squares and check as you go.  I had the misfortune of finishing a row and then held it up just miss an alignment half way through the row! Errrr…

Boarder:
Still using the ‘N’ hook but using only 1 strand of green yarn SC all the way around the blanket 2x, Add a SC in each corner so they remain square

Switch to the ‘K’ hook and 1 strand of taupe yarn
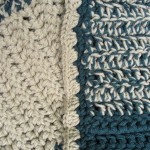
Tie your yarn in, Skip a stitch and DC 4x in the next stitch, skip a stitch and repeat 4 DC all the way around the blanket.  This boarder is meant to add a very slight ruffle to the edge and soften up the look of all those squares.

Fiber Arts Friday – Crochet Rag Rug

Welcome Fiber Arts Friday Folks

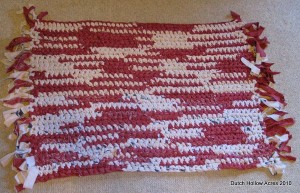
Last week I spent a lot of time cleaning the screen porch and getting all the leaves and dirt out of there that blew in through a hole last fall.  What a mess.  After I got the floor cleaned it looked so bare.  It wanted something, a rug.  I still had some old flannel sheets hanging around so I got to work ripping them into strips.

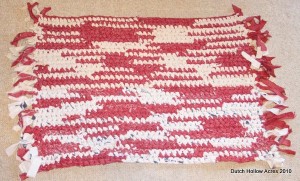
I decided on making a rectangle rug with a random color pattern.  It turns out that was the best choice because I ran out of the beige color!  I ended up replacing it with a more ivory color sheet which at a quick glance you don’t notice but if you look at it hard enough you can see where half the rug has beige and the other half has an ivory look. 

The method I used to connect the strips is exactly the same as the Christmas Rag Rug I made for my brother.  This time I decided not to make the rug the “toothbrush” way but crocheted it instead.  Crochet is faster and makes the rug a bit thicker but doesn’t wear as well as a toothbrush or braided rug.

Directions:

Making Fabric Strips:
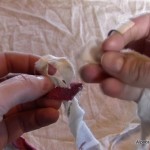
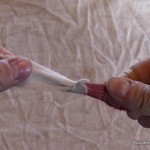
For my rug project I decided to repurpose some old flannel sheets.  I cut a little slits along one edge of the sheet every ½ to an  inch or so.  Now comes the fun part!  Grab that little fabric tag and rip!  The flannel sheets tore very evenly right down to the end without the need to cut each strip out by hand.  If you have a cat hanging around this process is very fascinating and you might have to fight for some of your strips back.

How To Connect Fabric Strips:
Now that you have all of these strips hanging around you need to be able to put them together.  Many suggestions have you sewing the strips together, which is great, if you have that kind of time to waste.  Easiest method I found is to cut a small slit in the ends of each strip and slipknot them together.  Thread one strip through the slit you made in the other and then feed the tail of the 1st strip through the slit you made in the end.  Pull tight and voila you have connected the 2 strips together.


Hook Size: S-35
Stitch: Single Crochet
Pattern: SC a chain the length you want the rug +1 SC and turn repeat until the width desired is reached.
Color Pattern: I chose to do a random pattern so I connected the strips as I went.
Fringe: Cut fabric strips into 8″ lengths.  Fold in half and feed the fold through the end and slip the tails through the fold and tighten.

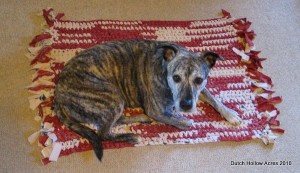
Finished rug size came out to 2ft x 3ft! My dog Brindee has claimed the rug as her own already. *sigh* maybe it’ll end up being a pet rug instead.

Fiber Arts Friday – Country Flannel

Welcome Fiber Arts Friday folks!

I have been working on a gift for my mom and I’m ½ way through and thought I’d share with you my progress.  I call this one country flannel. 

Mom asked for a warm lap blanket big enough to hide completely under.  When I’m done the dimensions will be 4ft wide by 6ft long which will be plenty big enough I’m sure. It will be really warm too since it’s crochet using 2 strands of yarn so it’s double thick.  I hope she enjoys the flannel pattern and colors; she wanted something that wouldn’t show pet hair too much.   No alpaca in this one, I wanted to be easy to care for and be something she could throw into the washing machine so it’s out of acrylic.

Country Flannel Blanket

Woven Crochet Scarf

Happy day after Mother’s Day!  I’m not sure what the weather was like where you are but in WNY it was COLD with winds up to 50-60mph and snow to add icing on the cake.  I can’t say I was in the spring mood after such terrible weather so I picked up my crochet hook and alpaca yarn and got to work.

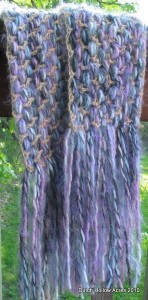
To be honest I really wasn’t sure what I was going to make so I just kept crocheting and decided to let my unconsciousness take over the project.  I seriously think I need to do this more often because I just fell in love with the end result!  I call it my woven crochet scarf.  Actually I made 2 of them. One with a white lattice and one with beige but with the same metallic pink weave.

I was able to recreate it and wrote down the pattern so I will finish the written pattern sometime this week and have it available in our shop for sale. 

As for the scarves, I can’t seem to get photography to do them any justice.  They are super soft and warm without being bulky and have a great flow to them.  I should have them up for sale later this week too but wanted to give you all a sneak peak!

Be sure to check out Fiber Arts Friday folks.