Fiber Arts Friday: Hog Island Sheep

I have been slacking in my fiber duties as of late but this past weekend brought me back into the swing of things.

Saturday I got to enjoy a day of fiber fun with my neighbor Stephanie who raises the rare breed of Hog Island Sheep.  I’m told there are about 200 head left in the US but you can see them in their original home setting still at Mount Vernon.

Clover_Hill_Hog_Island_Sheep

Note: Hog Island lambs are usually born with color but 90% of them end up turning white as adults.

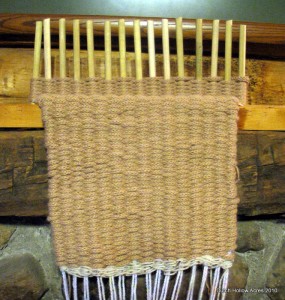
The most fun we had with the fiber was rug making.  Using raw fibers and only hand carders we wove the raw fleece straight onto the pegloom.  Stephanie really enjoyed the ease of using the loom and tells me her husband is in the works of making one for her.  I can’t wait to see her first full size rug on it.  I’m rather jealous since my raw alpaca doesn’t hold together even a 10th as nicely as her Hog Island does for weaving.

One thing I learned about Hog Island fleece is that it is springy! I think a small child could use a pile of their fleece as a trampoline. BOING!  She left me a small bag to play with and blend with other fibers. I think I’ll save it for the Tour de Fleece to work with.

I was a total idiot and didn’t take a single photo the entire time!  ARGH.  I blame it on the fact I was computer-less, the darn thing blew up on my Friday night and now I’m waiting for my new computer to come in. 

Be sure to check out Stephanie’s farm.  She is new to the fiber side of the business and has tons of this rare fleece. I’m sure she’ll be willing to sell some, if there are interested parties.

Stephanie Dempsey
Clover Hill Farm
2747 Bronson Hill Rd
Avon, NY 14414

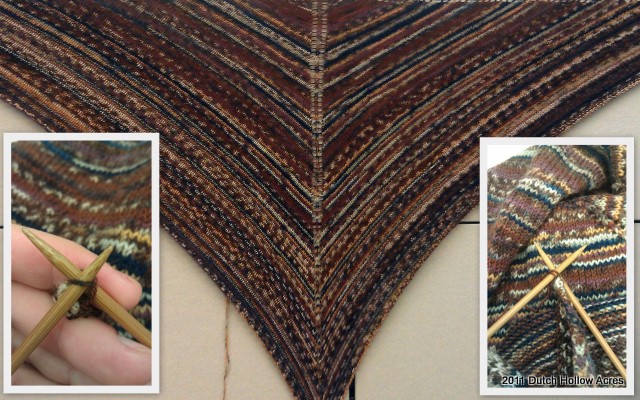
Anywho, having a fiber weekend inspired me to finally finish my sock yarn shawl.  I am proud to say as of Thursday I finally bound off, wove in all my ends and even got some fringe on it.  All that is left is to block it.  Oh and of course mail it off to its new owner.

The photo is not a true blocking, I just tacked it up to my cubicle wall at work to have a look at it.  I was so proud of my last bind off stitch I could help but get a photo of it too LOL.

Sock Yarn Shawl

 ———————————————————————————-
Be sure to check out these other great fiber arts sights!

PS I just read through this post and realized my thoughts are rambling with no real path.  I guess that’s what 2 over night shifts this week will do to a person.  I’m SO tired!
Photobucket
Creative Friday Button
>

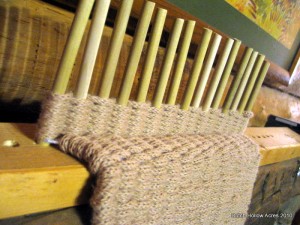
Fiber Arts Friday – How To Weave On A Peg Loom

Peg Loom Scarf
Hello Fiber Arts Friday, Crafty Friday fans and DIY Craft Linky!

As promised here is the tutorial on how to make and use a peg loom! (video at end of post)

Peg loom or peglooms are a popular fiber art in the UK but I could not find any information readily available in my internet searches on how to make or use this easy tool here in the states.  So, I figured I’d make my own.

The concept of a peg loom is very simple; it’s just a board, with holes drilled in it with pegs put in those holes.  Here’s the materials list I used to make my loom.

–       2×4 board (at least 3ft long if you plan on making rugs)
–       (4) 7/16 dowel
–       Measuring tape and pencil
–       Hand saw
–       Cordless drill
–       1/2 inch drill bit and a small bit just large enough for yarn to be thread through it 
–       Weaving material – bulky yarn, roving, fabric strips or even raw fiber

Cut your dowels down into 6” pieces (should get 36 out of 4 dowels)

On your 2×4 mark a spot in the center of the board every 1 inch, this is where you will drill holes (36 holes in all).  If you’re using a different sized dowel the rule of thumb is do double the diameter of your down to get the measurement to mark for drilling. 

Next start drilling where you marked.  Test your depth on the first hole by drilling down a bit and then putting the dowel in so it wants to stay in the hole.  Usually ½ – ¾ depth.

Next put all your dowels in the drilled holes and mark with your pencil where the dowel and the board meat.  Remove the each dowel and with a small drill bit drill a tiny hole about ¼ inch above the marked line.

Your Done!

Warping your Peg Loom

First determine the width you project will be.  For the scarf in the video I’m using only 3 pegs.  If you’re making a rag rug or a wool rug this loom can make up to a 3 foot wide rug!

Next choose your warp material.  Your warp will not show in your finished project unless you want to use it as fringe at the ends.  Your warp threads will need to be double the length of your finished product plus a little extra for fringe or to be used to tuck in.

Thread each peg with your warp and place the peg in its hole.

Weaving material can be anything from raw fleece locks, roving, rag stripes or even chunky yarns. (I’ll do a tutorial on using raw fiber at a later time when I get more fluff off my alpacas)

Weaving on your Peg Loom

To start off make a slip knot and place it over the first peg.  Weave in and out of all the pegs, when you get to the end come around the last peg and weave in and out the way back. Continue until your pegs are full.

When pegs are full pick up each peg and push down the weave onto the strings and replace the peg, repeat with the remaining pegs.  

Wash, rinse, repeat, LOL.  Yup that’s it keep on going it’s that easy.

When you get to the end tie off your last bit to the end peg.

Warp strings should now be knotted.  Tie the first (3) strings together on each end and then every (2) strings in the middle.  This will prevent your work from falling off the end.   Do the same on your finished end.

You can choose to leave your knotted warp strings as fringe or you can sew them up into your project.

Here’s the video of the peg loom scarf from start to finish.  Don’t worry I go hyper fast 12x through most of it so my 1/2 hour scarf fits in this video.

Fiber Arts Friday – Loom and Skein

Hi Fiber Arts Friday and Crafty Friday folks.

Ugh, the “day job” has had me very busy this week leaving me little time to enjoy my farm and all the animals let alone fiber arts.

So, here are some teaser photos of the project I have on the “secret loom.”  Ok, now that you have a photo of the loom do you have any idea what it is? 

Rug Loom

Rug Loom

The “rug yarn” I’m using on this loom I made from a fingering weight alpaca yarn using an “Embellish Knit.” I knew those As Seen On TV things would come in handy every now and again.

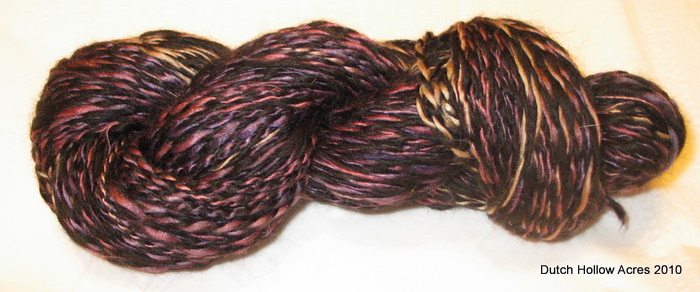
Lastly, I did manage to finish a skein of yarn.  The colored part is a merino/bamboo dyed in what I call “wine” colors.  Purples, reds, golds and the black is 100% alpaca.   I managed to work up 250 yards of this yarn and now I just need a project for it.

Alpaca Merino Yarn

Fiber Arts Friday – Crochet Bath Mat

Welcome Fiber Arts Friday and Craft Friday Folks

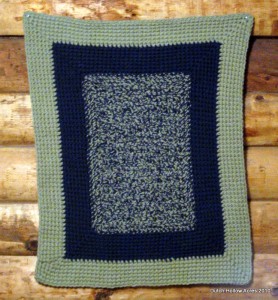
I have been home sick for most of the week which gave me some time to do a bigger project.  I had almost 2 pounds of Caron (Crap) yarn left over from my mom’s country flannel blanket project and decided to put them to use.  Since I really hate the feel of this yarn I didn’t want to make anything I had to wear.  It’s more of a blanket or rug yarn than a wearing yarn.  Hmmm… Rug yarn? Sounds like my kind of project!

I didn’t want to bore myself with a typical rug so I decided to learn a new stitch while making the center of this one. I figured I’d have enough yarn for a 2×3 foot rug so my ultimate goal was to have this one as a bathmat.  The best bathmats have a plush feel and that’s what I wanted this rug to be like. I looked around at a bunch of stitches and settled on the Cobble Stitch for the center.  The cobble stitch is really easy and goes like this  SC TR SC TR……..  That’s it.  Because I chose to use one of each color for the center you can’t really see the detail in the stitch but the treble areas puff up and make for a fluffy plush mat to step on.  The Single color boarders are just a SC all the way around.

2ft x 3ft bath mat with cobble stitch center

Lastly for FAF I want to introduce you to my next Wii game which I am now coveting.  Please Santa bring me this game for Xmas!  It is called… Kirby’s Epic Yarn.  Here’s the trailer for the video game.  Just check out that yarn knit world and all the buttons!

Fiber Arts Friday – Crochet Rag Rug

Welcome Fiber Arts Friday Folks

Last week I spent a lot of time cleaning the screen porch and getting all the leaves and dirt out of there that blew in through a hole last fall.  What a mess.  After I got the floor cleaned it looked so bare.  It wanted something, a rug.  I still had some old flannel sheets hanging around so I got to work ripping them into strips.

I decided on making a rectangle rug with a random color pattern.  It turns out that was the best choice because I ran out of the beige color!  I ended up replacing it with a more ivory color sheet which at a quick glance you don’t notice but if you look at it hard enough you can see where half the rug has beige and the other half has an ivory look. 

The method I used to connect the strips is exactly the same as the Christmas Rag Rug I made for my brother.  This time I decided not to make the rug the “toothbrush” way but crocheted it instead.  Crochet is faster and makes the rug a bit thicker but doesn’t wear as well as a toothbrush or braided rug.

Directions:

Making Fabric Strips:
For my rug project I decided to repurpose some old flannel sheets.  I cut a little slits along one edge of the sheet every ½ to an  inch or so.  Now comes the fun part!  Grab that little fabric tag and rip!  The flannel sheets tore very evenly right down to the end without the need to cut each strip out by hand.  If you have a cat hanging around this process is very fascinating and you might have to fight for some of your strips back.

How To Connect Fabric Strips:
Now that you have all of these strips hanging around you need to be able to put them together.  Many suggestions have you sewing the strips together, which is great, if you have that kind of time to waste.  Easiest method I found is to cut a small slit in the ends of each strip and slipknot them together.  Thread one strip through the slit you made in the other and then feed the tail of the 1st strip through the slit you made in the end.  Pull tight and voila you have connected the 2 strips together.


Hook Size: S-35
Stitch: Single Crochet
Pattern: SC a chain the length you want the rug +1 SC and turn repeat until the width desired is reached.
Color Pattern: I chose to do a random pattern so I connected the strips as I went.
Fringe: Cut fabric strips into 8″ lengths.  Fold in half and feed the fold through the end and slip the tails through the fold and tighten.

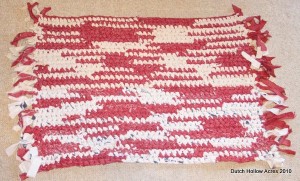
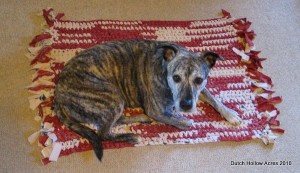
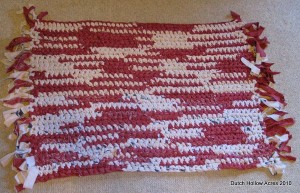
Finished rug size came out to 2ft x 3ft! My dog Brindee has claimed the rug as her own already. *sigh* maybe it’ll end up being a pet rug instead.