Big Bale Buddy Review – Year 2

Hello again everyone!  Well this is year 2 of using my Big Bale Buddy.  Yes it’s still in one piece with no rips or tears (that I didn’t purposely put there).  Click Here for Year 1 Review

This year I have a new hay supplier and the bales I’m feeding are smaller than the 4×5’s I had last year.  Which means my Large Buddy is too big for my new hay.  Whatever, since my buddy is now 2 years old and is out of warranty I opted to “modify” it to work with my current hay bales.  Well, let me tell you about my experimentation this year.

–       Attempt 1 – I put the “to large” buddy on the first bale and set it out as usual.  The horses almost immediately figured out that the buddy was too lose and pushed it down the bale and proceeded to make a mess. Errrr.

–       Attempt 2 – had me cutting a little hole and pushing a fish tape all the way through the “elastic” part of the buddy.  My hope was to back pull a rope and use that to cinch up the top so it would remain tight.  FAIL. The rope broke and the area was too tight to work in.

–       Attempt 3 – I happen to have a Shires Large Small Mesh Hay Net hanging around. I thought what if I make a slow feeder out of my buddy.  I punched holes in the buddy below the reinforced edge every 4-6 inches or so.   I then used an old nylon lunge line that was missing it’s snap end.  I wove the line though the buddy and then though the net all the way around and secured it with a knot.  After a few tries I learned that you always want to weave feeding the line from the inside to the outside of the buddy and to pull it tight with every weave cinching up the top.

Tada! Slow Feeding my round bale.  It’s a time consuming process though.  About 5 min to get the bale out and put the Big Bale Buddy on as usual and then another 15-20 minutes to weave the hay net into it.

I check the buddy every day to make sure nothing has broken, and that the hay net is still secure and no holes are forming where a hoof could get caught.

Feeding the round hay bale with a slow feeder is totally worth it.  My “naked” 500lb bale with 3 gluttonous horses only lasted from Sat – Thurs, 6 days.  My hay mesh modification extended the life from putting the bale out on Saturday and not having to put another one out until the following Tuesday.  That’s 10 full days AM and PM of the horses eating off of it.

If I am doing the math correctly; 500lbs over 10 days = 50lbs of hay per day being consumed vs. 84lbs being consumed per day without the saver.

NEWS UPDATE:  Of course just after I figured this whole slow feeding thing out the folks at Buddy Inc have come out with a full size slow feeding hay net that covers the entire round bale and even large square bales.   I think I’ll purchase one and test it out and give you all my 2 cents about it!


Fiber Arts Friday – How To Weave On A Peg Loom

Peg Loom Scarf
Hello Fiber Arts Friday, Crafty Friday fans and DIY Craft Linky!

As promised here is the tutorial on how to make and use a peg loom! (video at end of post)

Peg loom or peglooms are a popular fiber art in the UK but I could not find any information readily available in my internet searches on how to make or use this easy tool here in the states.  So, I figured I’d make my own.

The concept of a peg loom is very simple; it’s just a board, with holes drilled in it with pegs put in those holes.  Here’s the materials list I used to make my loom.

–       2×4 board (at least 3ft long if you plan on making rugs)
–       (4) 7/16 dowel
–       Measuring tape and pencil
–       Hand saw
–       Cordless drill
–       1/2 inch drill bit and a small bit just large enough for yarn to be thread through it 
–       Weaving material – bulky yarn, roving, fabric strips or even raw fiber

Cut your dowels down into 6” pieces (should get 36 out of 4 dowels)

On your 2×4 mark a spot in the center of the board every 1 inch, this is where you will drill holes (36 holes in all).  If you’re using a different sized dowel the rule of thumb is do double the diameter of your down to get the measurement to mark for drilling. 

Next start drilling where you marked.  Test your depth on the first hole by drilling down a bit and then putting the dowel in so it wants to stay in the hole.  Usually ½ – ¾ depth.

Next put all your dowels in the drilled holes and mark with your pencil where the dowel and the board meat.  Remove the each dowel and with a small drill bit drill a tiny hole about ¼ inch above the marked line.

Your Done!

Warping your Peg Loom

First determine the width you project will be.  For the scarf in the video I’m using only 3 pegs.  If you’re making a rag rug or a wool rug this loom can make up to a 3 foot wide rug!

Next choose your warp material.  Your warp will not show in your finished project unless you want to use it as fringe at the ends.  Your warp threads will need to be double the length of your finished product plus a little extra for fringe or to be used to tuck in.

Thread each peg with your warp and place the peg in its hole.

Weaving material can be anything from raw fleece locks, roving, rag stripes or even chunky yarns. (I’ll do a tutorial on using raw fiber at a later time when I get more fluff off my alpacas)

Weaving on your Peg Loom

To start off make a slip knot and place it over the first peg.  Weave in and out of all the pegs, when you get to the end come around the last peg and weave in and out the way back. Continue until your pegs are full.

When pegs are full pick up each peg and push down the weave onto the strings and replace the peg, repeat with the remaining pegs.  

Wash, rinse, repeat, LOL.  Yup that’s it keep on going it’s that easy.

When you get to the end tie off your last bit to the end peg.

Warp strings should now be knotted.  Tie the first (3) strings together on each end and then every (2) strings in the middle.  This will prevent your work from falling off the end.   Do the same on your finished end.

You can choose to leave your knotted warp strings as fringe or you can sew them up into your project.

Here’s the video of the peg loom scarf from start to finish.  Don’t worry I go hyper fast 12x through most of it so my 1/2 hour scarf fits in this video.

Fiber Arts Friday – Picture Frame Looms

Welcome Back Fiber Arts Friday and Crafty Friday Folks

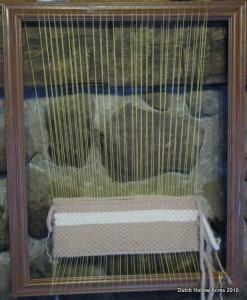
Sticking with my theme from last week I’ve been researching homemade looms and decided to try one of them out.  I picked a simple picture frame loom to start with and though the loom is simple apparently the technique for use is not.

Picture Frame Loom Attempt 1:

I found an old frame in my basement, knocked out the glass and said goodbye to the ugly hotel art that was in there and got to work.  The warp is VERY simple.  Take your string/yarn and wrap the loom on the longest side.  Wrap as wide as you want your end project to be and space the yarn about ¼” apart, keep tension taught and even.

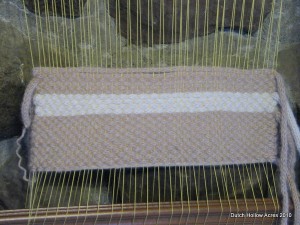
Weave your fiber of choice over under all the strands.  Because there’s a space in your warp thanks to the thickness of the frame one direction of weaving is very fast and the other direction is slow going having to go over/under on the way back.

Here’s my work thus far… FAIL.  As you can see I started to cinch the ends too tightly and the bottom of my project is wider than the top. ERRR

Picture Frame Loom

Picture Frame Loom

Picture Frame Loom Attempt 2:

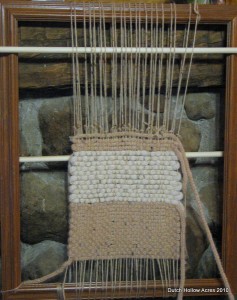
Ok, so I totally ripped apart my project and started again.  This time I decided to try using some dowels to speed the process up.  1 Dowel is fed through the center of the warp to keep it open.  The 2nd Dowel I put on the bottom and used loops of yarn to attach each top strand to the dowel.  That way when I pulled on the dowel all the attached strands would move with it causing a nice little shed row without me having to weave over/under.

Here’s my new attempt.  Still a fail in my mind but I’ve gotten better with leaving slack at the edges so they don’t taper in.  I was using a fork to pack my rows and apparently I didn’t do that great of a job because they are very loose.  Oh well, I’m still learning.

Picture Frame Loom

Top Secret Loom Project.

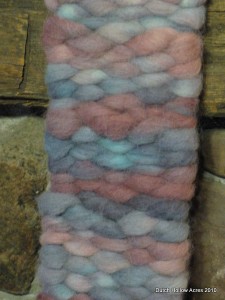
Ok my last loom experiment used a new loom entirely but alas I didn’t have time to document it so I’ll have to leave you wondering how I made this until another post.  I’ll give you a hint though… this type of loom is often used to weave raw wool locks.  For my mini test project in this photo I chose to use some pin drafted roving (available in our shop of course).  I can’t wait to attempt a full scale project on this loom.  I’m going to see if I can use raw alpaca, I’m not sure how well it’ll hold together since alpaca doesn’t have the memory or desire to felt quickly like wool.   Don’t worry, I plan to document the dickens out of this method since it is rarely used.

Weaving with Roving

Last day to enter the Alpaca Sock Giveaway – Drawing is tomorrow 11/13/10

Fiber Arts Friday – Cardboard Looms

Fiber Arts Friday and Crafty Friday Folks

On my travels through the InterWeb I came across some fun new things to try out.  I am always interested in weaving and love my mini loom but I want to make bigger things than a 1-2 inch wide strip.  So, I traveled through the cyberness and found some fun projects for kids making a weaving loom out of cardboard.

The idea is simple really.  Take a piece of cardboard, cut ½ in slits every ¼ in down one side and again opposite that side.  String up your yarn and start weaving over/under.  I’m surprised really that I didn’t learn this in Girl Scouts.  I guess I was more interested in starting fires than girly things.  Here’s a link to the tutorial I used.

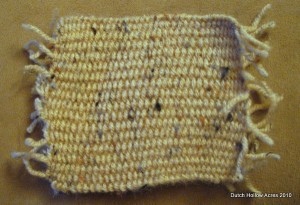
So, tada! My first ever woven coaster.

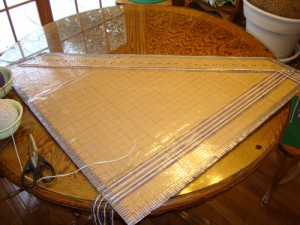
Coasters are fine and good but bigger, I want BIGGER!  I like the idea of cardboard looms so there really must be something that I could make using one.   Of course the fruits of the web were bountiful yet again.  I present to you links to wonderful documentation on how to make your own cardboard triangle loom. 

Building a Cardboard Triangle Loom

Weaving on a Cardboard Triangle Loom

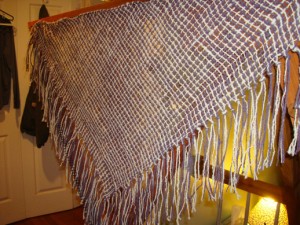
http://www.sandiveracres.com/fiberCreations.html has several beautiful creations off a loom she made. Here’s a photo of her loom and the shawl she made

It appears that the Warkworth Spinners & Weavers Guild in Warkworth, Ontario are the authors of the above files and I thank them tremendously for providing such detailed information.  I will be working on making my loom and weaving on it over the next few weeks.

Lastly there’s still time to enter in our Alpaca Sock Giveaway!  Just do one or more of the following to enter.

Like AlpacaBytes on Facebook
Like Dutch Hollow Acres on Facebook
Follow Us on Twitter
Comment on the Alpaca Sock Giveaway Post – Spam will be deleted and is not eligible

The contest remains open until 11/12 and a winner will be drawn on 11/13