Welcome Fiber Arts Friday Fans with WonderyWhyGal
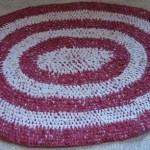
Rag rugs are a blast to make and do not require any fancy techniques like crocheting. The rugs are fairly quick to make and you can see the results of your efforts take shape in just a few rows. This technique is not limited to rugs, you can also make other items like a rag placemat, dog bed, cat bed, bedspread, basket, or anything else you can think of. These rugs can be great kids projects too since it involves fun things like ripping of fabric.
Making a Rug Tool:
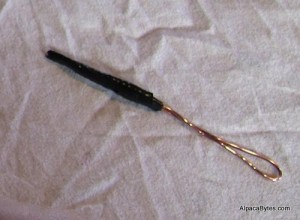
Rag rugs are often called Toothbrush rugs because of the type of tool used to make them. Folks used to cut the head off an old toothbrush and file it down to a point while using the pre-drilled hole (for hanging your tooth brush) as a place to attach the fabric to. Today, there are fancy prefabricated tools you can use or you can still make your own. Technically a rug tool is just a really big needle.
I’m cheap so I chose to make my rug tool out of scraps I found in the basement. My needle is made out of scrap copper wire and electrical tape. It might not be pretty but who cares, it’s free.
Making Fabric Strips:
For my rug project I decided to repurpose some old flannel sheets. I cut a little slits along one edge of the sheet every ½ inch or so. Now comes the fun part! Grab that little fabric tag and rip! The flannel sheets tore very evenly right down to the end without the need to cut each strip out by hand. If you have a cat hanging around this process is very fascinating and you might have to fight for some of your strips back.
How To Connect Fabric Strips:
Now that you have all of these strips hanging around you need to be able to put them together. Many suggestions have you sewing the strips together, which is great, if you have that kind of time to waste. Easiest method I found is to cut a small slit in the ends of each strip and slipknot them together. Thread one strip through the slit you made in the other and then feed the tail of the 1st strip through the slit you made in the end. Pull tight and voila you have connected the 2 strips together.
Starting Your 1st Row:
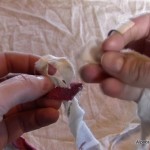
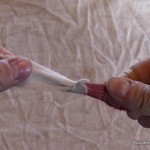
These directions are for a rectangular rug. I will cover oval rugs and circle rugs on another post. Start your rug at the connecting slipknot where your 2 fabric strips meet. 1 of these strips will be the “core” the other will be used to tie the knots. I’m right handed so find it easier to hold my strips in my left hand and use my rug tool in my right. In the photos the light colored fabric is the “core” and the red is what I’ll be tying knots with.
– First cross the red over the white so it looks like the number “4”
– Feed the tail of the red behind the white and through the loop hole in the “4”
– Pull the red all the way through and make your first knot. Keep this first row fairly taught but not so tight that you won’t be able to get your tool through again later
– Make sure your “core” fabric stays straight and doesn’t get curled up into your knots
– Continue knotting until you achieve the width of the rug that you want
– Row 1 can be a bit of a pain. You may find it easier to use a safety pin to secure it to something. I usually like to stand up and place the first knot on a hook and knot my first row from there.
Starting Row 2 – ?
Again, these directions are for a rectangular rug. This is the easier of the rug patterns to make and does not require any extra stitches per row. The length of your first row is the width of your rug. How many rows you add on from this point determines the length of your rug.
– When you’re ready to start your next row, fold your “core” fabric over so it is now playing alongside your row of knots.
– With your rug tool stab the center of the last knot you had just made
– Make sure you still go behind the “core” fabric before you come through the loop
Changing colors:
Solid color rugs are no fun of course you want to change colors. When you get to a point you want a new color just cut the fabric off, cut a new slit in the end that is part of your rug and tie in your new color.
Video of all the steps described above! In HD!
