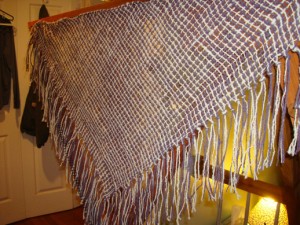
WIP: Fan Pattern Shawl Con’t

So my hope was to finish the shawl sitting around a camp fire while we were camping at Letchworth State Park this past weekend.  Instead our camp fire dreams were stomped out by Smokey the Bureaucratic State Employee Bear!   

  1. Letchworth kicked us out of our cabin that we’ve rented for the past 11 years and tossed us in another one while our usual cabin was geting an overhaul.  Why? Because….
  2. Letchworth took out ALL wood burning stoves from ALL of the cabins
  3. Letchworth no longer provides campers with firewood even for outside camp fires
  4. Letchworth pissed me off and totally ruined our camping trip! ARGH

The first night we all stood around what used to be a fireplace and did nothing but bellyache about Letchworth.  We were so bored we all went to bed at 9pm totally sober and irate.   

Day 2 was a little better; we drank beer, ate bacon and eventually went on a hike.  Later we drove all the way back to Geneseo to pick up some of those manufactured logs just so we could have an outside camp fire.  More drinking made the processed fire almost look realistic.

Letchworth State Park
LSP - Outlet after lowerfalls footbridge.

Letchworth State Park
LSP - Lower Falls after a hard rain.

Since most of my time was spent complaining about the State of New York and Letchworth State Park in general I only got 1 pattern row done on my scarf.  But, the good news is I’m almost done with a skein and there’s 1 more skein left to work and the other one will be used for fringe.   


Oh, I also read a book called “A Dog’s Purpose” by Bruce Cameron.  If you’re a dog lover I highly recommend it.  If you’re a crier keep tissues handy.  I slobbered all over my sleeping bag and pillow on several occasions.  

Click Here for link parties!
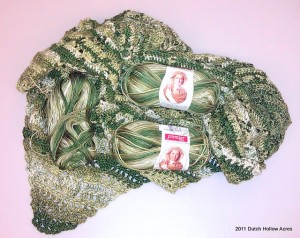
WIP: Green Shawl Progress

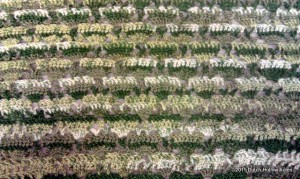
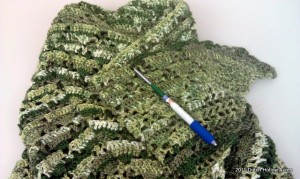
I’ve been working away on the green fan shawl when I can.  It’s to the point now where I hate doing a row because it takes SO long and there’s little visible growth.  But, I got 3 full pattern rows done on Tuesday which added another 6” to the shawl so I’m happy

crochet_fan_pattern_shawl

Size wise it currently is the length of 1 arm, my chest and to my elbow of the other arm.  I have a 6 foot wing span so I’m thinking it’s about 4.5 ft wide and about 2.75 ft long.  Yes, this is how I measure things.  Very scientific isn’t it?

crochet_fan_pattern_shawl

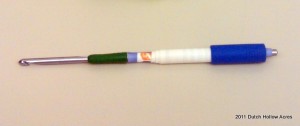
This is actually the first time I’ve used the 3.75mm crochet hook and it’s been angering my pinky.  The hook shaft must be rubbing on a nerve in my pinky finger and the darn think tingles after just a few minutes.  So I started modifying it.  At first I put on one of the rubber crochet grippies but that did nothing.  Next I added a post-it note and a sticker but it wasn’t fat enough so 3 more stickers were added.  Then the post-it note gave up its grip and the whole thing started to slide around so I added 2 rounds of scotch tape and slid the apparatus over the tape and it stuck nicely.  Lastly I still wanted more bulk on the end so took the rubber grip off my pen and put it on. 

Tada! My nice fat grip 3.75mm crochet hook.  Oh yeah, the only reason I did this is because the new ChiaoGoo hook that I bought that has a nice flat and fat bamboo handle made stitches too loosely compared to the hook I was using. Ugh.  Oh well, I’ll use it on another project from start to finish.

redneck_crochet_hook

With any luck I will have this shawl finished in time to go up for sale this coming Fiber Market Monday. What is Fiber Market Monday?  It’s a new link party specifically geared to promoting handmade fiber items, raw fiber or fiber animals so come on back this coming Monday and check out all the goodies!

Click Here for link parties I participate in!

WIP – Even better on Tuesday

Ok So I’m going to do my WIPs on Tuesdays because on Wednesday I want to focus my attention on Fiber Wordless Wednesdays.

Since I started documenting my WIPs I’ve realized how many projects I have started but not finished.  I have a LOT more than I’d like to admit but here are 2 that I’m focusing on completing.

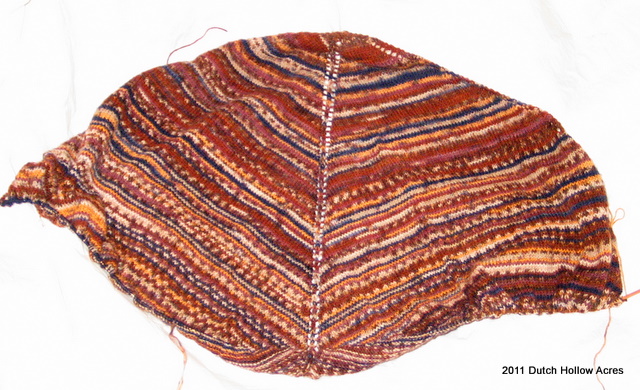
The most important of these of course is my sock yarn shawl.  I want this thing DONE.  Unfortunately I don’t know when “done” is.  The measurement currently from neck to tip is 26” but how much will this thing stretch out when blocked?  I just don’t know.  I’d like that measurement to ultimately be 36” after blocking.  Oh well I guess I’ll just knit until the skein I’m using is done and see what happens.

Sock Yarn Shawl
Shawl is on 40" rounds

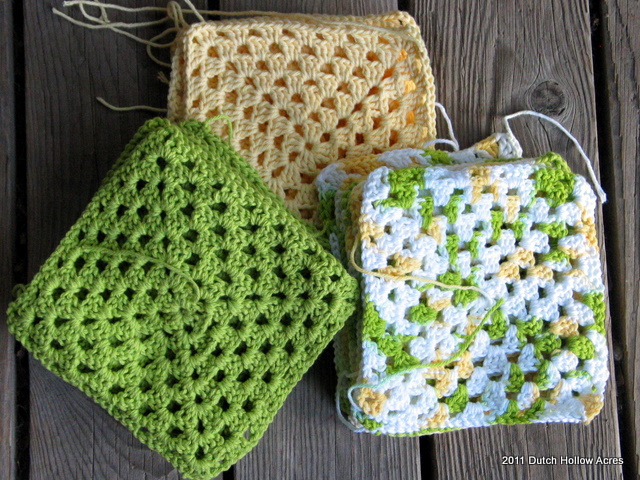
The 2nd project that I’m now starting to work on again in earnest is my summer afghan.  I started this one last year and found and about 30 finished squares in a tub while I was digging through my stash.  I figure I need about 60 squares to complete an afghan to fit a twin size bed.  M. Hates the colors but I like them, with snow storm after snow storm I need something bright and cheery to look at.

So what are you working on?

Fiber Arts Friday – Picture Frame Looms

Welcome Back Fiber Arts Friday and Crafty Friday Folks

Sticking with my theme from last week I’ve been researching homemade looms and decided to try one of them out.  I picked a simple picture frame loom to start with and though the loom is simple apparently the technique for use is not.

Picture Frame Loom Attempt 1:

I found an old frame in my basement, knocked out the glass and said goodbye to the ugly hotel art that was in there and got to work.  The warp is VERY simple.  Take your string/yarn and wrap the loom on the longest side.  Wrap as wide as you want your end project to be and space the yarn about ¼” apart, keep tension taught and even.

Weave your fiber of choice over under all the strands.  Because there’s a space in your warp thanks to the thickness of the frame one direction of weaving is very fast and the other direction is slow going having to go over/under on the way back.

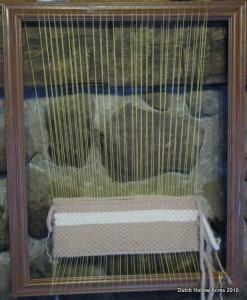
Here’s my work thus far… FAIL.  As you can see I started to cinch the ends too tightly and the bottom of my project is wider than the top. ERRR

Picture Frame Loom

Picture Frame Loom

Picture Frame Loom Attempt 2:

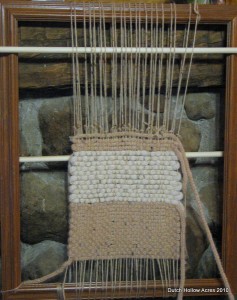
Ok, so I totally ripped apart my project and started again.  This time I decided to try using some dowels to speed the process up.  1 Dowel is fed through the center of the warp to keep it open.  The 2nd Dowel I put on the bottom and used loops of yarn to attach each top strand to the dowel.  That way when I pulled on the dowel all the attached strands would move with it causing a nice little shed row without me having to weave over/under.

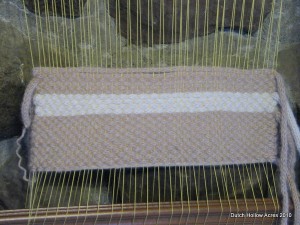
Here’s my new attempt.  Still a fail in my mind but I’ve gotten better with leaving slack at the edges so they don’t taper in.  I was using a fork to pack my rows and apparently I didn’t do that great of a job because they are very loose.  Oh well, I’m still learning.

Picture Frame Loom

Top Secret Loom Project.

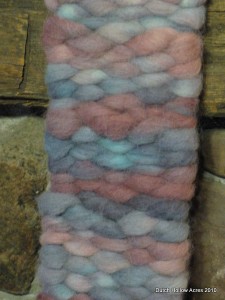
Ok my last loom experiment used a new loom entirely but alas I didn’t have time to document it so I’ll have to leave you wondering how I made this until another post.  I’ll give you a hint though… this type of loom is often used to weave raw wool locks.  For my mini test project in this photo I chose to use some pin drafted roving (available in our shop of course).  I can’t wait to attempt a full scale project on this loom.  I’m going to see if I can use raw alpaca, I’m not sure how well it’ll hold together since alpaca doesn’t have the memory or desire to felt quickly like wool.   Don’t worry, I plan to document the dickens out of this method since it is rarely used.

Weaving with Roving

Last day to enter the Alpaca Sock Giveaway – Drawing is tomorrow 11/13/10

Fiber Arts Friday – Cardboard Looms

Fiber Arts Friday and Crafty Friday Folks

On my travels through the InterWeb I came across some fun new things to try out.  I am always interested in weaving and love my mini loom but I want to make bigger things than a 1-2 inch wide strip.  So, I traveled through the cyberness and found some fun projects for kids making a weaving loom out of cardboard.

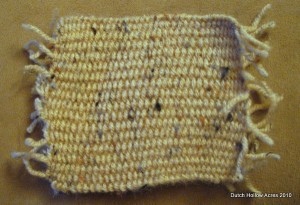
The idea is simple really.  Take a piece of cardboard, cut ½ in slits every ¼ in down one side and again opposite that side.  String up your yarn and start weaving over/under.  I’m surprised really that I didn’t learn this in Girl Scouts.  I guess I was more interested in starting fires than girly things.  Here’s a link to the tutorial I used.

So, tada! My first ever woven coaster.

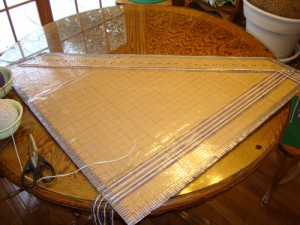
Coasters are fine and good but bigger, I want BIGGER!  I like the idea of cardboard looms so there really must be something that I could make using one.   Of course the fruits of the web were bountiful yet again.  I present to you links to wonderful documentation on how to make your own cardboard triangle loom. 

Building a Cardboard Triangle Loom

Weaving on a Cardboard Triangle Loom

http://www.sandiveracres.com/fiberCreations.html has several beautiful creations off a loom she made. Here’s a photo of her loom and the shawl she made

It appears that the Warkworth Spinners & Weavers Guild in Warkworth, Ontario are the authors of the above files and I thank them tremendously for providing such detailed information.  I will be working on making my loom and weaving on it over the next few weeks.

Lastly there’s still time to enter in our Alpaca Sock Giveaway!  Just do one or more of the following to enter.

Like AlpacaBytes on Facebook
Like Dutch Hollow Acres on Facebook
Follow Us on Twitter
Comment on the Alpaca Sock Giveaway Post – Spam will be deleted and is not eligible

The contest remains open until 11/12 and a winner will be drawn on 11/13